Introduction
When the weather is warm or when you simply want something sweet without turning on the oven cold desserts are hard to beat. These creamy No Bake Berry Cheesecake Cups were developed for exactly that purpose: a chilled dessert that looks elegant, tastes indulgent, and remains practical enough for an ordinary home kitchen.
There is a satisfying contrast between textures in every spoonful. The cheesecake layer is cool, smooth, creamy, and lightly tangy, while crushed graham crackers provide a delicate buttery crunch. Fresh berries bring a bright, juicy burst that prevents the dessert from becoming overly rich. A small amount of lemon juice sharpens the overall flavor, making the sweetness taste cleaner and more balanced.
In the DaliyDelish kitchen, this style of dessert was tested with one goal in mind: to create a reliable cold dessert that does not depend on complicated baking techniques. The testing focused on the things that most often go wrong with no-bake desserts runny filling, overly sweet cream cheese, soggy crumbs, weak berry flavor, and poor chilling time.
The most important discovery was that temperature is part of the recipe, not merely the final step. Properly softened cream cheese creates a smooth filling, while sufficiently chilled cream helps the dessert develop a spoonable, mousse like consistency. Keeping the crumb layer relatively dry also helps preserve its texture.
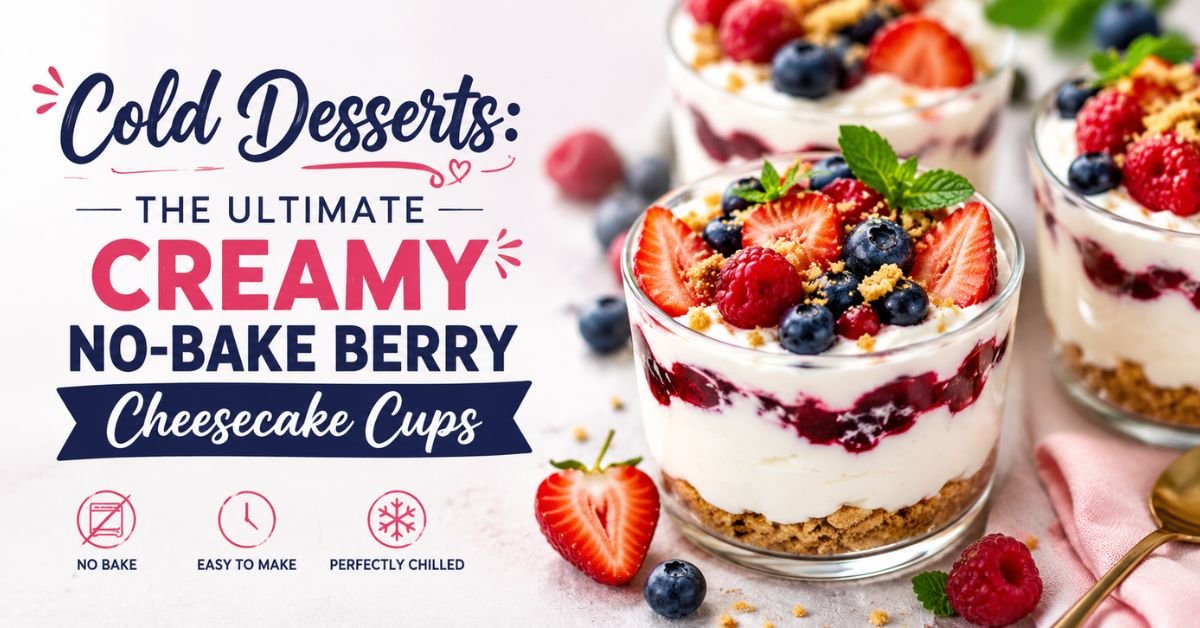
Visually, these cheesecake cups are especially appealing. The pale, creamy filling contrasts beautifully with ruby-red berries and golden crumbs, creating individual portions that look restaurant-worthy without requiring professional pastry skills.
If you’re searching for cold desserts, easy cold desserts, no-bake desserts, summer desserts, or make-ahead desserts, this recipe is a versatile place to start.
Recipe Quick-Facts Summary Card
| Detail | Information |
| Recipe | No-Bake Berry Cheesecake Cups |
| Prep Time | 25 minutes |
| Cook Time | 0 minutes |
| Chilling Time | 3–4 hours |
| Total Time | About 3 hours 25 minutes |
| Skill Level | Easy to Intermediate |
| Servings | 8 individual cups |
| Estimated Calories | About 390 calories per serving |
| Estimated Cost | Approximately 1.75–2.50 per serving, depending on ingredients |
| Primary Diet Type | Vegetarian |
| Cooking Method | No-bake / chilled |
| Best For | Parties, summer gatherings, family desserts, make-ahead entertaining |
Important: Nutrition and cost figures are estimates. Actual values vary according to brands, portion sizes, and ingredient substitutions.
Why This Recipe Works
1. Balanced Sweetness and Acidity
Cream cheese naturally provides mild acidity, but lemon juice and berries take that balance further. Instead of creating a dessert that tastes simply sugary, the recipe builds several flavor layers: sweet, tangy, creamy, buttery, and fruity.
2. No Oven Required
One of the biggest advantages of this recipe is that it is completely no-bake. There is no pastry crust to blind-bake, no cheesecake to crack, and no oven temperature to monitor. That makes it especially useful during hot weather.
3. Individual Portions Improve Texture
Serving the cheesecake in individual glasses or dessert cups means the filling can chill evenly. It also reduces the need to slice a traditional cheesecake, which can be difficult when a no-bake filling is very soft.
4. Affordable Ingredients
Cream cheese, graham crackers, berries, cream, sugar, and lemon are relatively accessible ingredients. Frozen berries can also be used when fresh berries are expensive or out of season.
5. Make-Ahead Friendly
The dessert actually benefits from resting in the refrigerator. Several hours of chilling allow the filling to become firmer and give the flavors time to integrate. This makes it practical for dinner parties because most of the work can be completed before guests arrive.
Kitchen Tools & Equipment Guide
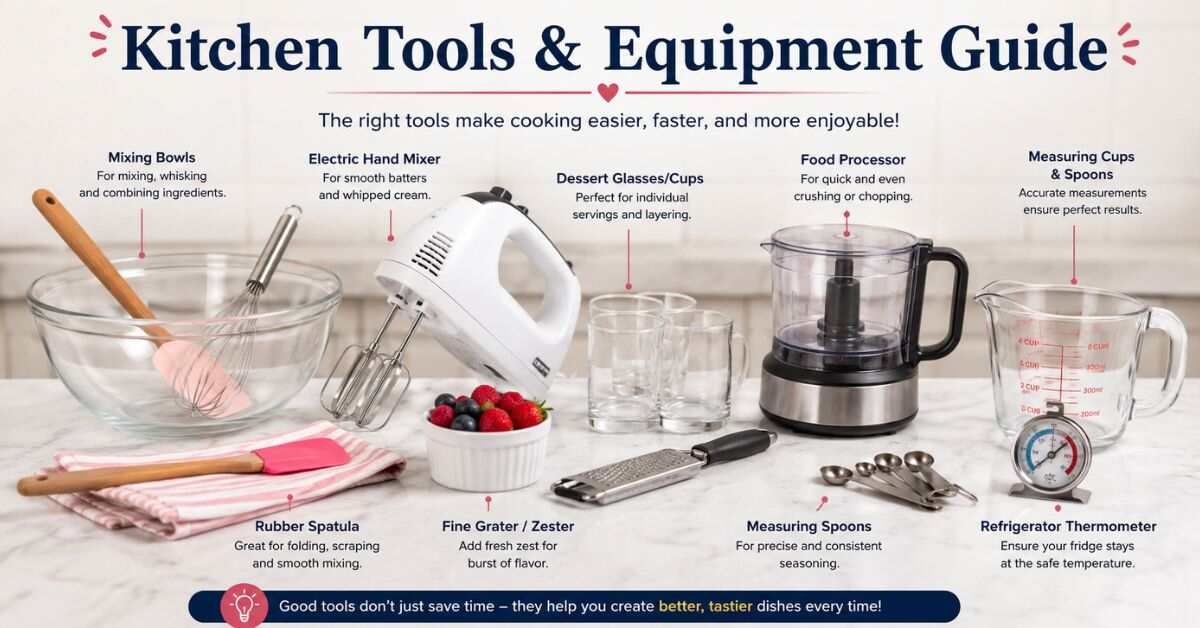
You do not need specialized pastry equipment to make these cold desserts successfully.
Essential equipment includes:
- Mixing bowls: Use separate bowls for the cream cheese mixture and whipped cream.
- Electric hand mixer: Helps create a smooth cream cheese base and properly aerated whipped cream.
- Rubber spatula: Ideal for folding whipped cream without aggressively deflating it.
- Food processor or rolling pin: Useful for crushing graham crackers evenly.
- Measuring cups and spoons: Accurate measurements are important for maintaining the filling’s consistency.
- Eight small dessert glasses or cups: Approximately 6–8 ounces each works well.
- Fine grater or microplane: Useful for fresh lemon zest.
- Refrigerator thermometer: Optional, but helpful for confirming that your refrigerator remains at 40°F / 4°C or below, the recommended maximum refrigerator temperature for perishable foods.
A whisk can work for small tasks, but an electric mixer makes achieving a stable, fluffy cream much easier.
Ingredient Selection, Quality & Substitutions
For the Graham Cracker Base
- Graham crackers: 160 g / about 1 ⅔ cups finely crushed
- Unsalted butter, melted: 70 g / 5 tablespoons
- Granulated sugar: 25 g / 2 tablespoons
The graham cracker layer provides the dessert’s buttery, lightly caramelized foundation. Crush the crackers fairly finely, but avoid turning them completely into flour. A small amount of texture creates a better eating experience.
Substitution: Digestive biscuits can replace graham crackers at roughly the same weight. Gluten-free graham crackers can also be used when appropriate.
For the Cheesecake Filling
- Full-fat cream cheese, softened: 450 g / 16 ounces
- Powdered sugar: 90 g / ¾ cup
- Heavy whipping cream, cold: 240 ml / 1 cup
- Fresh lemon juice: 30 ml / 2 tablespoons
- Finely grated lemon zest: 1 teaspoon
- Pure vanilla extract: 5 ml / 1 teaspoon
- Fine salt: 1 small pinch
Full-fat cream cheese generally provides the richest texture. Reduced-fat cream cheese can work, but the final filling may be softer and less luxurious.
The cream should be cold when whipped. Cold cream traps air more effectively and generally produces better volume.
For the Berry Layer
- Fresh strawberries, chopped: 150 g / 1 cup
- Fresh blueberries: 125 g / about ¾ cup
- Fresh raspberries: 100 g / about ¾ cup
- Granulated sugar: 15 g / 1 tablespoon
- Fresh lemon juice: 15 ml / 1 tablespoon
You can use a mixture of berries or choose just one variety. Strawberries provide sweetness and body, blueberries add gentle floral notes, and raspberries contribute a sharper acidity.
For Garnishing
- Fresh berries: 100 g / about ¾ cup
- Lemon zest: ½ teaspoon
- Mint leaves: Optional
- Crushed graham crackers: 2–3 tablespoons
Dairy-Free Substitution
For a dairy-free variation, use a plant-based cream cheese and a dairy-free whipping alternative designed for desserts. Because different brands contain different stabilizers and water levels, the finished texture can vary.
Lower-Sugar Variation
You can reduce the powdered sugar modestly, especially if your berries are naturally sweet. Avoid eliminating it entirely without testing because sugar contributes not only sweetness but also affects the texture and balance of the filling.
Keto-Friendly Adaptation
For a lower-carbohydrate version, replace the graham cracker base with a mixture of finely ground almonds, melted butter, and a suitable granulated low-carbohydrate sweetener. Use a sweetener that you know you tolerate well and follow its manufacturer’s conversion guidance.
Low-Sodium Consideration
Choose unsalted butter and check packaged ingredients such as graham crackers and cream cheese for sodium. The dessert itself does not require much added salt; a tiny pinch is primarily used to enhance sweetness and flavor perception.
Culinary Masterclass: Step-by-Step Instructions
Step 1: Prep Work & Seasoning
Start by preparing the ingredients before mixing anything.
Allow the cream cheese to soften at room temperature until it is pliable but not warm or melted. Properly softened cream cheese should yield easily when pressed with a spatula. If it is too cold, beating it can leave small lumps throughout the finished filling.
Wash the berries under cool running water and dry them thoroughly. Excess water can dilute the berry mixture and make the dessert watery.
For the strawberry layer, remove the stems and chop the berries into small pieces. Combine strawberries, blueberries, raspberries, sugar, and lemon juice in a bowl.
Let the berries sit for approximately 10–15 minutes.
This short resting period allows the sugar and acidity to draw some flavorful juices from the fruit. You are not trying to create a thin syrup; the goal is a glossy berry mixture with recognizable pieces of fruit.
For the crumb base, crush the graham crackers and combine them with melted butter and sugar.
The mixture should resemble damp sand. When squeezed gently between your fingers, it should hold together briefly but crumble easily when disturbed.
If it looks dry, add a small amount of melted butter. If it looks greasy, add a little more crushed cracker.
Step 2: Building the Creamy Filling
Mix together the softened cream cheese and the powdered sugar.
Beat it on medium speed until smooth, scraping down the sides of the bowl as necessary.
Add the powdered sugar gradually rather than dumping it in all at once. This minimizes lumps and helps create a smooth filling.
Add the vanilla, lemon zest, lemon juice, and a small pinch of salt.
Beat briefly until everything is incorporated.
At this point, taste the mixture.
The flavor should be creamy, lightly tangy, clearly sweet, and fresh from the lemon. If it tastes excessively sweet, a small additional amount of lemon juice can help rebalance it, but add it gradually so the filling does not become too acidic.
In a separate chilled bowl, whip the cold heavy cream until it reaches medium-to-stiff peaks.
The correct stage is important. When you lift the beaters, the cream should hold its shape rather than immediately flowing back into the bowl. Do not continue beating after the cream becomes firm and smooth, because over-whipping can make it grainy and eventually push it toward a butter-like texture.
Fold approximately one-third of the whipped cream into the cream cheese mixture first.
This lightens the dense cream cheese base.
Use a rubber spatula to gently fold in the remaining whipped cream.
Use broad movements from the bottom of the bowl upward. The goal is to combine the mixtures while retaining as much air as possible.
Step 3: Layering & Chilling
Prepare eight individual dessert glasses.
Add approximately 2 tablespoons of graham cracker crumbs to the bottom of each glass.
Press them gently with the back of a spoon. Do not compress them excessively. A slightly loose crumb layer gives the dessert a more pleasant texture.
Add a layer of cheesecake filling.
A piping bag can make this process particularly neat, but a spoon works perfectly well.
Add a spoonful of the macerated berries.
In case your glasses are large enough, repeat the layers.
Finish with a generous spoonful of cheesecake filling.
Cover the cups loosely with plastic wrap or another suitable refrigerator-safe covering.
Refrigerate for at least 3 hours, preferably 4 hours.
For the best texture, the refrigerator should be maintained at 40°F / 4°C or below.
The filling should become noticeably firmer while remaining creamy. It should hold its shape on a spoon rather than behaving like liquid custard.
Step 4: Finishing, Resting, and Garnishing
Just before serving, remove the chilled cheesecake cups from the refrigerator.
Add fresh berries, a small sprinkle of graham crumbs, and a little lemon zest.
A single mint leaf can provide an attractive finishing touch, but it is optional.
Do not garnish several hours in advance with delicate mint or wet crumbs because they can lose their fresh appearance.
Serve the dessert cold.
For the best sensory contrast, take a spoonful that includes crumbs, cheesecake filling, and berries in the same bite. This gives you buttery crunch, creamy richness, and bright fruit acidity simultaneously.
The Science of Flavor & Chef’s Insider Techniques
Although this is a no-bake dessert, there is plenty of food science happening in the bowl.
Cream Fat and Structure
Heavy cream contains milk fat that helps create a stable whipped structure when air is incorporated. Keeping the cream cold makes whipping easier because the fat globules are better positioned to partially stabilize the air bubbles.
That is why warm cream tends to whip poorly.
Why Cream Cheese Needs to Be Softened
Cold cream cheese can remain lumpy even after prolonged beating. Bringing it to a cool room-temperature consistency allows it to blend smoothly with sugar and acidic ingredients.
However, avoid leaving dairy products unrefrigerated for extended periods. The goal is simply to soften the cream cheese enough to mix efficiently.
Acid Controls Perceived Sweetness
Lemon juice is not there merely for a lemon flavor.
Acidity helps counterbalance sweetness. A dessert containing sugar, cream, and cream cheese can taste heavy without a contrasting acidic component. Lemon makes the fruit and dairy flavors seem brighter.
Maceration Intensifies Fruit Flavor
When sugar is added to fresh berries, it draws out some moisture through osmosis. This creates a naturally flavored fruit syrup around the berries.
The result is more aromatic and juicy than simply placing plain berries into the dessert.
Temperature Changes Texture
Chilling allows the fat in the cream cheese, butter, and whipped cream to become firmer. The crumb mixture also becomes more cohesive as the butter cools.
This is why rushing the refrigeration stage can produce a dessert that tastes good but lacks structural stability.
Chef’s Insider Technique
For an especially smooth filling, scrape the bowl several times during mixing.
Cream cheese often sticks to the sides and bottom of a mixing bowl. If those areas are not incorporated, the finished filling can contain small pockets of dense cream cheese.
Another professional habit is to taste before layering. Once the filling is divided among cups, adjusting the overall sweetness becomes much more difficult.
Common Cooking Mistakes & Troubleshooting Guide
Mistake 1: The Filling Is Lumpy
Cause: The cream cheese was too cold.
Fix: Let the cream cheese soften properly before mixing. If the mixture is already lumpy, continue beating briefly while scraping the bowl frequently. Avoid adding lots of liquid to solve the problem because this can make the filling loose.
Mistake 2: The Whipped Cream Is Grainy
Cause: The cream has been over-whipped.
Fix: If it has only just become grainy, gently fold in a small amount of unwhipped cold cream and stop mixing as soon as the texture smooths. If it has separated significantly into butter-like solids and liquid, it is better to restart.
Mistake 3: The Dessert Is Too Soft
Cause: Insufficient chilling, overly warm ingredients, excessive liquid from berries, or insufficiently whipped cream.
Fix: Refrigerate longer before serving. If the dessert remains very soft after adequate chilling, check the ingredient ratios. Drain excess berry juice before layering.
Mistake 4: The Crumb Layer Is Soggy
Cause: Too much moisture has migrated into the crumbs.
Fix: Keep the berry mixture from directly soaking the entire crumb layer. For make-ahead preparation, consider placing a thin cheesecake layer between the crumbs and juicy berries.
Preparation and reheating of meals and food safety
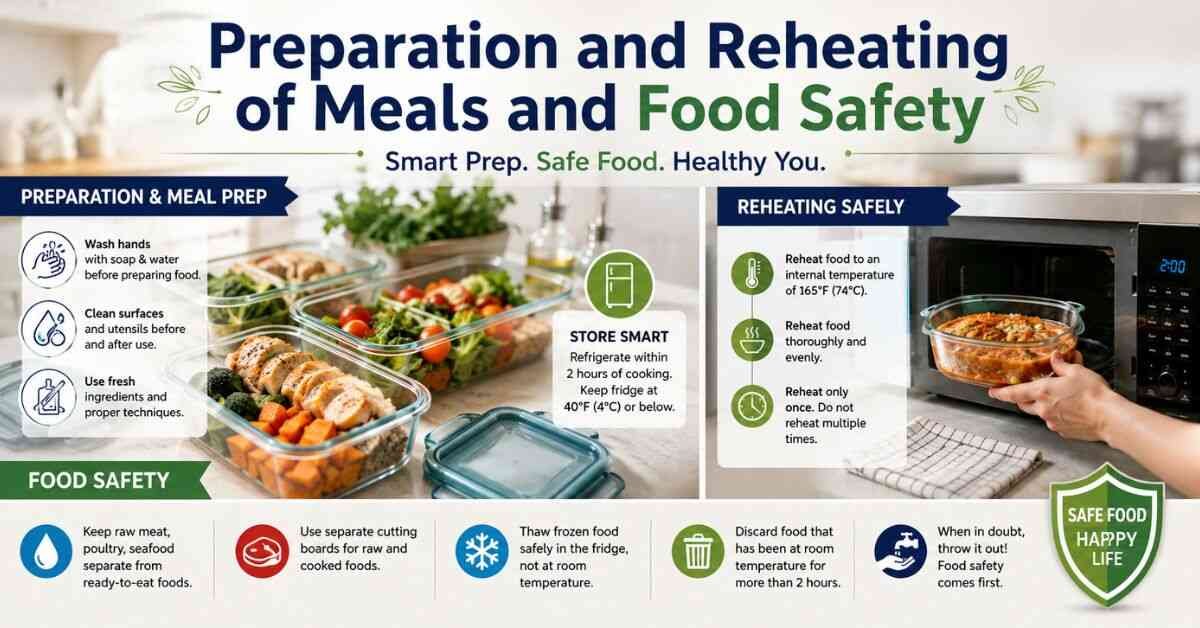
Because this dessert contains dairy and fresh fruit, temperature control is important.
Keep the finished cheesecake cups refrigerated at 40°F / 4°C or below.
Do not leave them sitting at room temperature for extended periods, particularly during warm weather. For gatherings, place the dessert on a chilled serving tray and return leftovers to the refrigerator promptly.
Refrigerator Storage
For best quality, consume the cheesecake cups within approximately 3–4 days when continuously refrigerated.
The dessert may remain safe depending on handling and ingredient freshness, but texture and fruit quality generally decline over time.
Keep the cups covered to prevent them from absorbing refrigerator odors and to reduce moisture loss.
Freezer Storage
The cheesecake filling can be frozen, but freezing changes the texture of fresh berries and whipped dairy.
If you want to freeze the dessert, use freezer-safe containers and expect the berries to become softer after thawing.
Thaw at room temperature instead of in the refrigerator to get the best results.
Meal-Prep Strategy
Prepare the graham crumb mixture, cheesecake filling, and berries separately.
Store each component in covered containers in the refrigerator and assemble the cups several hours before serving.
This approach gives you better control over texture, especially if you are preparing the dessert a day ahead.
Reheating
Do not reheat this dessert.
Cold cheesecake cups are designed to be served chilled. Allowing them to warm excessively can soften the filling and compromise food quality.
Nutrition & Dietary Considerations
Estimated nutrition per serving:
| Nutrient | Approximate Amount |
| Calories | 390 kcal |
| Protein | 5–6 g |
| Carbohydrates | 35–40 g |
| Fat | 25–28 g |
| Fiber | 2–3 g |
| Sodium | Approximately 250–330 mg |
| Added Sugars | Approximately 18–22 g |
These figures are estimates based on standard ingredient values and may vary considerably according to the specific brands and quantities used.
This dessert is best considered an occasional sweet treat, rather than a primary source of nutrition.
The berries contribute fiber and micronutrients, while cream cheese and cream contribute fat and some protein, but the dessert also contains added sugar and saturated fat.
For smaller portions, divide the mixture among 10–12 cups instead of eight. This is an easy way to create a lighter serving without changing the recipe.
For dietary adaptations, use certified gluten-free graham crackers for a gluten-free version and suitable plant-based alternatives for dairy-free preparation. Always check product labels when cooking for someone with a food allergy.
Pairings & Serving Suggestions
These cheesecake cups are already rich and flavorful, so pair them with foods and beverages that provide freshness rather than additional heaviness.
Fresh Fruit
Serve alongside sliced peaches, kiwi, blackberries, melon, or extra strawberries. Tart fruits work particularly well because they contrast with the creamy filling.
Light Brunch Menu
For brunch, serve these cold desserts after:
- Vegetable omelets
- Fresh fruit salad
- Whole-grain toast
- Yogurt parfaits
- Light breakfast sandwiches
Dinner Party Menu
After a savory meal, keep the dessert portion modest and serve it with:
- Roasted chicken
- Fresh green salad
- Grilled vegetables
- Lemon-herb fish
- Light pasta dishes
Beverage Pairings
A cup of unsweetened coffee creates a pleasant bitter contrast to the sweet cheesecake.
For tea lovers, try black tea, green tea, chamomile, or peppermint tea.
Sparkling water with lemon or berries is another excellent non-alcoholic pairing.
Presentation Tip
Use clear dessert glasses whenever possible. The visible layers are part of the appeal.
For a polished presentation, wipe the inside rim of each glass before chilling. A clean glass makes the contrasting layers look much more professional.
Final Verdict & Reader Invitation
These Cold Desserts: No-Bake Berry Cheesecake Cups combine everything a great chilled dessert should offer: creamy texture, bright berries, buttery crumbs, refreshing lemon, and effortless preparation.
The recipe is flexible enough for casual family dinners yet attractive enough for birthdays, summer parties, holidays, and dinner guests. Most importantly, it gives home cooks a dependable dessert without requiring an oven or advanced pastry techniques.
Make a batch, chill them properly, and serve them straight from the refrigerator for the best texture.
If you try this DaliyDelish recipe, rate it with stars and share your results in the comments. Tell us which berries you used, what substitutions worked for you, and any questions you had while making it. Your feedback can help other DaliyDelish readers create an even better batch of cold desserts.
Some of the best cold desserts include no-bake cheesecake, icebox cakes, mousse cups, chilled puddings, frozen yogurt desserts, fruit parfaits, and layered cheesecake cups. Recipes that can be prepared ahead and stored in the refrigerator are particularly convenient during warm weather.
For these cheesecake cups, refrigerate them for at least 3 hours, with approximately 4 hours providing a more developed texture. Overnight chilling is also convenient when preparing dessert ahead of time.
The most common causes are insufficient chilling, cream that was not whipped enough, cream cheese that was too warm, or too much liquid in the mixture. Refrigerate the dessert longer first. If it remains loose, review the ingredient ratios and ensure your whipped cream reached medium-to-stiff peaks.
Yes. These cheesecake cups are particularly suitable for advance preparation. Assemble them several hours before serving and keep them continuously refrigerated. For the freshest appearance, add delicate garnishes such as mint and extra crumbs shortly before serving.

Tosique Haider -Passionate writer sharing informative, engaging, and easy-to-read articles across different topics. Focused on delivering valuable content that helps readers learn, explore, and stay inspired every day.