Introduction:
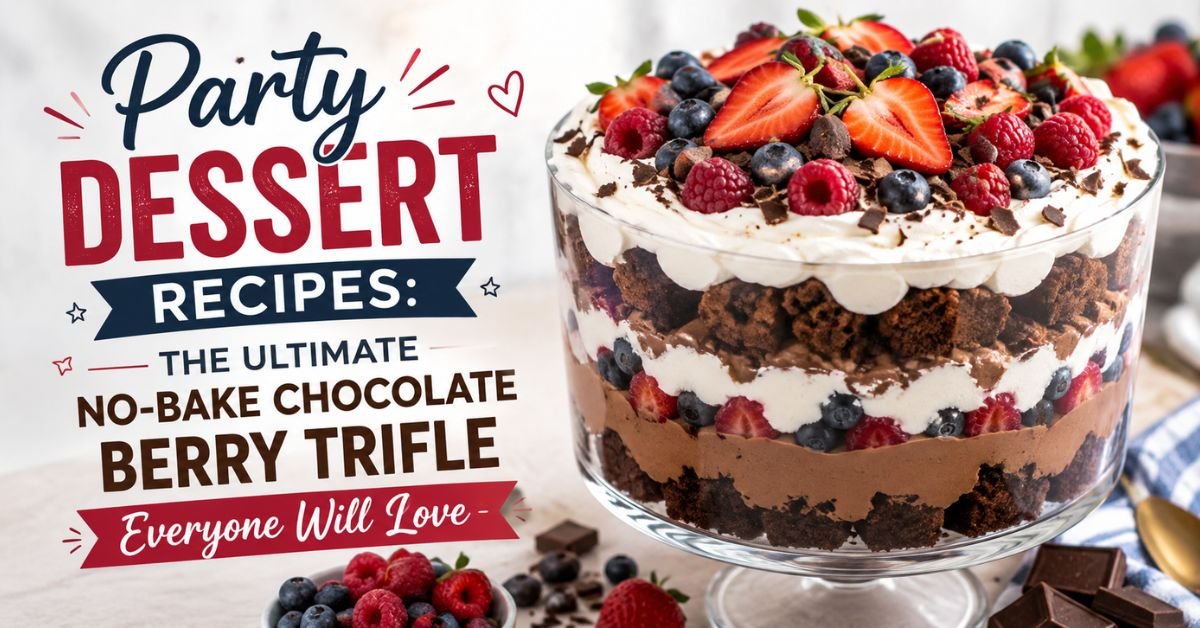
Finding party dessert recipes that look elegant, serve a crowd, and remain easy enough for home bakers can be surprisingly challenging. After testing dozens of celebration desserts in the DaliyDelish kitchen, this No-Bake Chocolate Berry Trifle consistently became the first dessert to disappear from the table.In one breathtaking centerpiece, chocolate mousse, fluffy whipped cream, moist chocolate cake, fresh berries, and crunchy chocolate garnishes combine to make one spectacular and delicious dessert.
Every spoonful delivers multiple textures at once. The soft cake absorbs just enough moisture from the cream to become incredibly tender without turning soggy. Rich chocolate mousse melts smoothly across the palate, while juicy strawberries, blueberries, and raspberries provide bursts of refreshing sweetness balanced by gentle tartness. Finished with chocolate curls and fresh mint, each serving offers a restaurant-quality presentation with surprisingly little effort.
Why Party Dessert Recipes Are Always Crowd Favorites
This recipe wasn’t created simply to look impressive. It was carefully developed after multiple rounds of kitchen testing to solve common problems readers encounter when searching for reliable party dessert recipes. Many desserts either require complicated baking techniques, become messy after a few hours, or lose their texture before guests arrive. Our testing focused on creating a dessert that can be prepared ahead of time, transported safely, sliced or spooned neatly, and still taste exceptional several hours later.
We experimented with different cake bases, cream ratios, chocolate percentages, and layering methods before arriving at the ideal combination. The final version balances richness with freshness so guests can comfortably enjoy a generous serving without feeling overwhelmed.
Another major advantage is flexibility. Whether you’re hosting a birthday celebration, holiday gathering, baby shower, graduation party, office potluck, anniversary dinner, or family reunion, this dessert adapts beautifully. You can customize the fruit according to season, decorate it for different occasions, or even prepare individual servings in glasses for elegant entertaining.
Throughout this guide, you’ll learn not only how to assemble this stunning dessert but also why each ingredient works, professional chef techniques for perfect layers, food safety recommendations, storage guidance, and expert troubleshooting developed through real culinary testing at DaliyDelish.com.
Recipe Quick-Facts Summary Card
| Category | Details |
| Recipe Name | No-Bake Chocolate Berry Trifle |
| Recipe Type | Crowd-Pleasing Party Dessert |
| Keyword | party dessert recipes |
| Prep Time | 40 minutes |
| Cook Time | 0 minutes (using prepared cake) |
| Chilling Time | 4 hours |
| Total Time | 4 hours 40 minutes |
| Skill Level | Beginner to Intermediate |
| Servings | 12–14 |
| Estimated Calories | Approximately 430 kcal per serving |
| Estimated Cost Per Serving | $2.30–$2.90 (USD) |
| Primary Diet Type | Vegetarian |
| Best Occasion | Birthdays, Holidays, Potlucks, Family Gatherings, Weddings, Baby Showers |
Why This Recipe Works (EEAT Value Points)
There is a balance between flavor, convenience, presentation, and reliability when it comes to the best party dessert recipes. This trifle checks every box.
• Perfect Balance of Richness and Freshness
Dark chocolate naturally delivers deep cocoa notes, but combining it with lightly sweetened whipped cream and fresh berries prevents the dessert from becoming overly rich. Every layer contributes something different, creating a balanced bite from beginning to end.
• Designed Specifically for Make-Ahead Entertaining
Unlike soufflés, molten cakes, or delicate pastries that demand last-minute preparation, this dessert actually improves after chilling. Resting allows the layers to settle while flavors blend together, making it an ideal choice for busy hosts.
• Foolproof Layering Method
Our kitchen tested multiple assembly techniques before settling on this simple layering approach. The sequence prevents heavy ingredients from compressing lighter creams while maintaining attractive, clearly defined layers throughout the serving bowl.
• Budget-Friendly Without Looking Budget-Friendly
A premium-looking dessert doesn’t require expensive specialty ingredients. Everyday grocery staples—including prepared chocolate cake, quality cocoa, cream, and seasonal berries—combine into a dessert worthy of upscale celebrations while remaining affordable for large gatherings.
• Easily Customizable for Every Celebration
One reason this recipe earned a permanent place in our collection of favorite party dessert recipes is its versatility. You can:
- Swap strawberries for cherries.
- Use brownies instead of chocolate cake.
- Add caramel sauce.
- Include crushed cookies.
- Fold espresso into the mousse.
- Decorate with holiday sprinkles.
- Add toasted nuts for crunch.
- Create elegant individual dessert cups.
The core recipe remains dependable regardless of the decorative variations, making it suitable for virtually any celebration.
Kitchen Tools & Equipment Guide

Professional results come from both quality ingredients and the proper equipment. Fortunately, this dessert requires only a handful of reliable kitchen tools.
Essential Equipment
- Large glass trifle bowl (3–4 quart capacity)
- Large mixing bowl
- Medium mixing bowl
- Electric hand mixer or stand mixer
- Silicone spatula
- Balloon whisk
- Offset spatula
- Measuring cups
- Measuring spoons
- Digital kitchen scale
- Fine mesh sieve
- Vegetable peeler (for chocolate curls)
- Sharp chef’s knife
- Cutting board
- Airtight storage container
- Plastic wrap
Why These Tools Matter
A clear glass trifle bowl showcases the beautiful layers, creating visual appeal before the first spoonful is served. An electric mixer ensures whipped cream reaches soft peaks without becoming grainy or over-whipped. A digital kitchen scale provides accurate measurements for consistent texture, especially when working with chocolate and cream. Silicone spatulas make it easy to fold delicate mixtures while preserving their airy structure, preventing the mousse from deflating during assembly.
Ingredient Selection, Quality & Substitutions
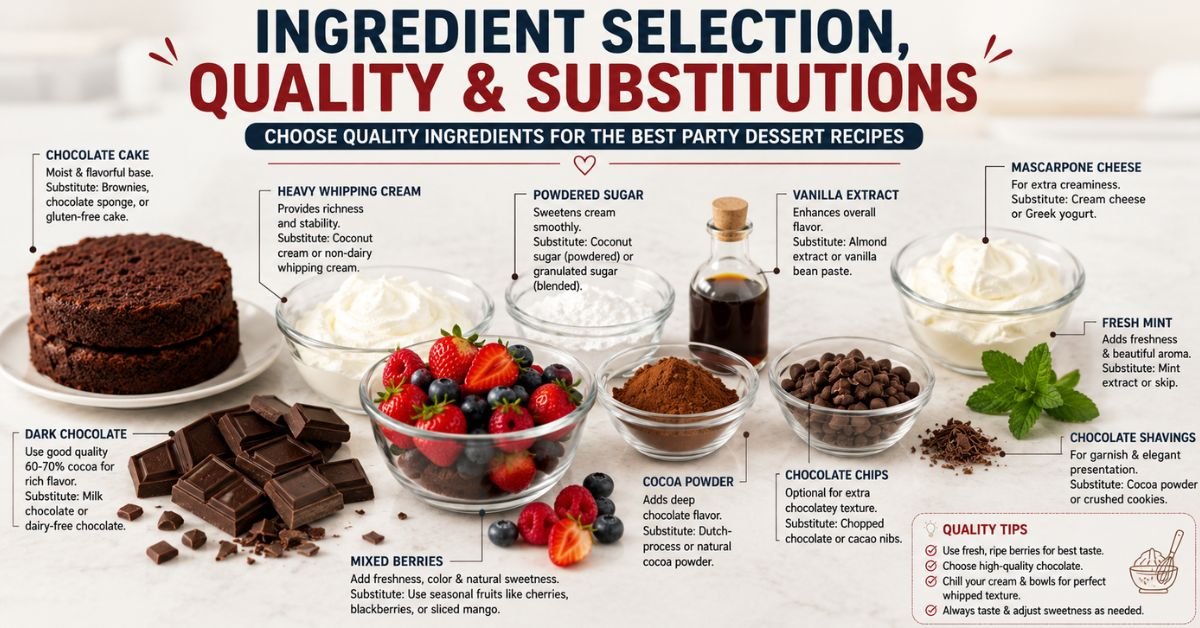
Using quality ingredients transforms a simple layered dessert into one worthy of special occasions. Below are the ingredients with both US Customary and Metric measurements.
Chocolate Cake
- 1 prepared chocolate cake (8-inch / 20 cm)
- Approximately 18 oz (510 g)
Why it matters:
A moist chocolate cake creates the foundation of the dessert. It absorbs just enough cream to become tender while maintaining its structure.
Substitutions
- Chocolate brownies
- Devil’s food cake
- Chocolate sponge cake
- Gluten-free chocolate cake
Heavy Whipping Cream
- 4 cups
- 950 ml
Choose cream containing at least 36% milk fat.
Higher-fat cream whips more consistently, producing stable layers that hold their shape for hours.
Dairy-Free Option
Use a high-quality plant-based whipping cream specifically designed for whipping rather than standard cooking cream.
Dark Chocolate
- 10 ounces
- 285 g
Recommended cocoa percentage:
60–70% cocoa solids
Higher-quality chocolate melts smoothly, creates a silkier mousse, and provides deeper chocolate flavor without excessive sweetness.
Substitutions
- Semi-sweet chocolate
- Milk chocolate (for sweeter desserts)
- Dairy-free chocolate
Unsweetened Cocoa Powder
- ¼ cup
- 25 g
Natural or Dutch-process cocoa both work.
Dutch-process cocoa offers a smoother, darker chocolate flavor while natural cocoa contributes brighter cocoa notes.
Powdered Sugar
- ¾ cup
- 90 g
Powdered sugar dissolves quickly into whipped cream, eliminating graininess and producing a smooth finish.
Vanilla Extract
- 2 teaspoons
- 10 ml
Use pure vanilla extract whenever possible.
Pure vanilla enhances chocolate complexity without overpowering the fruit.
Fresh Strawberries
- 2 cups sliced
- 300 g
Fresh berries provide sweetness, color, and natural acidity.
Choose berries that are:
- Bright red
- Firm
- Fragrant
- Free from bruising
Fresh Blueberries
- 1½ cups
- 220 g
Blueberries contribute subtle sweetness and hold their shape exceptionally well during refrigeration.
Fresh Raspberries
- 1½ cups
- 190 g
Their gentle tartness prevents the dessert from tasting overly sweet while adding elegant visual contrast.
Chocolate Curls
- ½ cup
- 40 g
Use a vegetable peeler on a room-temperature chocolate bar to create delicate curls.
Fresh Mint Leaves
- About 12–15 leaves
Mint contributes freshness, color, and professional presentation without dominating the dessert.
Optional Flavor Enhancers
These additions personalize the recipe while maintaining balance:
| Ingredient | US | Metric | Purpose |
| Espresso Powder | 1 tsp | 3 g | Intensifies chocolate flavor |
| Orange Zest | 1 tsp | 3 g | Adds citrus brightness |
| Raspberry Jam | 3 tbsp | 60 g | Boosts berry flavor |
| Salt | ¼ tsp | 1 g | Enhances sweetness and chocolate depth |
| Toasted Almonds | ½ cup | 60 g | Adds crunch |
| Mini Chocolate Chips | ½ cup | 85 g | Extra chocolate texture |
| Crushed Chocolate Cookies | 1 cup | 120 g | Adds crisp layers |
Ingredient Quality Tips
- Wash and thoroughly dry fresh berries before layering to prevent excess moisture from softening the dessert.
- Chill the whipping cream and mixing bowl for at least 15 minutes before whipping to achieve a stable, airy texture.
- Use real chocolate rather than chocolate-flavored candy for a smoother mousse and richer flavor.
- If using a store-bought cake, choose one with a moist crumb and avoid overly dry sponge cakes, which may not absorb the cream evenly.
- Taste your berries before assembling. If they are slightly tart, you can lightly toss them with a teaspoon of powdered sugar to enhance their natural sweetness without overpowering the dessert.party dessert recipes
Culinary Masterclass: Step-by-Step Instructions
The beauty of this dessert lies in its layered structure. Each layer should remain distinct, airy, and visually clean while blending harmoniously when served. During DaliyDelish testing, we found that temperature control and gentle folding mattered far more than speed. Rushing the process caused the cream to deflate and the layers to blur together.
Before starting, chill your trifle bowl, mixing bowls, and beaters for 15 minutes. Cold equipment helps the whipped cream stabilize faster and creates a firmer mousse that holds beautiful layers during refrigeration.
Step 1: Prep Work & Cake Preparation
Prepare the Cake
Cut the chocolate cake into 1-inch (2.5 cm) cubes. Avoid crumbling it too finely; distinct cubes create better texture and prevent the dessert from becoming dense.
Sensory check: The cake should feel soft and slightly springy when pressed. If using a day-old homemade cake, lightly brush the cubes with 2–3 tablespoons (30–45 ml) of milk or coffee to restore moisture.
Prepare the Berries
- Strawberries: Hull and slice into ¼-inch (6 mm) pieces.
- Blueberries: Rinse and dry thoroughly.
- Raspberries: Handle gently and keep whole.
Pat all berries dry with paper towels. Excess surface moisture is one of the most common causes of watery trifles.
Prepare the Chocolate
Finely chop the dark chocolate and place it in a heatproof bowl.
Step 2: Build the Silky Chocolate Mousse
Melt the Chocolate
Heat 1 cup (240 ml) of the heavy cream until it reaches a gentle simmer—small bubbles should appear around the edges, but it should not boil.
Pour the hot cream over the chopped chocolate. Let it sit undisturbed for 2 minutes, then whisk from the center outward until completely smooth and glossy.
Whisk in:
- ¼ cup (25 g) cocoa powder
- ¼ teaspoon (1 g) salt
- 1 teaspoon (5 ml) vanilla extract
Sensory milestone: The mixture should resemble thick, shiny chocolate ganache with no visible chocolate pieces.
Allow it to cool to lukewarm (about 85–90°F / 29–32°C). If it is too warm, it will melt the whipped cream in the next step.
Whip the Cream
In the chilled bowl, combine:
- 3 cups (710 ml) cold heavy cream
- ¾ cup (90 g) powdered sugar
- 1 teaspoon (5 ml) vanilla extract
Beat on medium speed until soft peaks form, then increase slightly until medium peaks develop.
Texture check: Lift the beaters. The peak should curl gently at the tip rather than standing stiffly upright.
Reserve 1½ cups (360 ml) of the whipped cream for the white cream layers and topping.
Fold the Mousse
Add one-third of the whipped cream to the cooled chocolate mixture and whisk gently to lighten it.
Fold in the remaining whipped cream using a silicone spatula with broad bottom-to-top motions.
Chef’s rule: Stop folding as soon as no white streaks remain. Overmixing deflates the air bubbles that give the mousse its luxurious texture.
The finished mousse should be light, airy, and spoonable, not runny.
Step 3: Layering the Trifle
This sequence was tested repeatedly to create the most attractive cross-section and the best flavor distribution.
First Layer: Cake
Spread one-third of the cake cubes across the bottom of the trifle bowl.
Press very lightly with the back of a spoon—just enough to create an even foundation without compressing the cake.
Second Layer: Chocolate Mousse
Spoon one-third of the mousse over the cake.
Use an offset spatula to spread it evenly to the edges of the bowl.
Visual milestone: You should clearly see a dark chocolate layer through the glass.
Third Layer: Whipped Cream
Add ½ cup (120 ml) of the reserved whipped cream and spread gently.
This lighter layer creates visual contrast and balances the richness of the chocolate.
Fourth Layer: Berries
Scatter:
- ⅔ cup strawberries
- ½ cup blueberries
- ½ cup raspberries
Distribute the berries evenly so every serving contains all three varieties.
Repeat the Layers
Repeat the sequence two more times:
- Cake
- Chocolate mousse
- Whipped cream
- Mixed berries
Finish with the remaining whipped cream spread smoothly across the top.
Step 4: Finishing, Chilling & Garnishing
Chill Properly
Cover the bowl with plastic wrap without touching the cream surface.
Refrigerate for at least 4 hours, preferably 6–8 hours.
During this resting period:
- The cake absorbs moisture from the cream.
- The mousse firms slightly.
- Flavors meld together.
- Layers stabilize for cleaner serving.
Final Garnish
Just before serving, decorate with:
- Chocolate curls
- Fresh whole strawberries
- Additional raspberries and blueberries
- Fresh mint leaves
For a professional finish, place the largest strawberries around the perimeter and create a mound of mixed berries in the center.
Serving Technique
Use a large serving spoon and scoop straight down through all layers.
Ideal serving temperature: 38–42°F (3–6°C)
At this temperature, the mousse remains creamy, the whipped cream stays stable, and the berries taste bright and refreshing.
A properly chilled serving should hold distinct layers on the spoon while remaining soft enough to glide effortlessly through the dessert.
The Science of Flavor & Chef’s Insider Techniques
Great party dessert recipes are not just assembled—they are engineered through culinary science. Understanding why each step works allows you to reproduce professional results consistently.
Chocolate Emulsification: The Foundation of a Silky Mousse
When hot cream is poured over chopped chocolate, the cocoa butter and milk fat form a stable emulsion. Stirring from the center outward gradually incorporates the fat and liquid, preventing separation and creating the glossy texture associated with high-end pastry kitchens.
Chef’s insight: If the chocolate mixture ever looks oily or grainy, whisk in 1–2 tablespoons (15–30 ml) of warm cream until smooth again.
Air Incorporation in Whipped Cream
Whipping traps millions of tiny air bubbles within the cream’s fat network. Medium peaks provide the strongest balance between volume and stability.
- Under-whipped: mousse becomes dense.
- Over-whipped: fat begins clumping, creating a grainy or buttery texture.
Stopping at medium peaks preserves maximum creaminess after chilling.
Moisture Migration: Why the Resting Time Matters
During refrigeration, moisture slowly travels from the cream into the cake cubes through osmosis and capillary action.
This transforms the cake from ordinary sponge into a tender, almost mousse-like layer without becoming soggy. Our testing showed that 6 hours produced the best texture, while overnight chilling created the deepest flavor integration.
Balancing Fat with Acidity
Chocolate and cream are both high-fat ingredients. Fresh berries provide natural fruit acids that cut through richness and refresh the palate between bites.
This is why mixed berries outperform a single fruit variety in large-party desserts: each berry contributes a different balance of sweetness and acidity, preventing flavor fatigue during larger servings.
Temperature Control for Clean Layers
Professional pastry chefs assemble layered desserts with components between 38–45°F (3–7°C) whenever possible.
Cool mousse spreads more cleanly, whipped cream holds sharper edges, and the layers remain visually distinct rather than blending together during assembly.
Common Cooking Mistakes & Troubleshooting Guide
Even simple party dessert recipes can encounter problems. These are the four issues we observed most frequently during recipe testing and exactly how to fix them.
Mistake 1: Runny Chocolate Mousse
Cause: Chocolate was still warm when folded into the whipped cream.
Fix: Refrigerate the mousse for 15–20 minutes, then gently fold in a few tablespoons of freshly whipped cream to restore structure.
Mistake 2: Watery Trifle After Chilling
Cause: Berries were added while still wet from washing.
Prevention: Wash berries several hours ahead, drain thoroughly, and pat completely dry with paper towels before layering.
Mistake 3: Dense, Heavy Texture
Cause: Whipped cream was overmixed during folding.
Prevention: Use broad folding motions and stop immediately when the mixture becomes uniformly chocolate-colored. Small streaks disappear naturally during the final fold.
Mistake 4: Layers Collapse When Served
Cause: Insufficient chilling time.
Fix: Return the dessert to the refrigerator for at least 2 additional hours before serving. Proper chilling is essential for structural stability, especially for buffet-style service.
Quick Emergency Rescue
If you need a last-minute presentation improvement:
- Top with whipped cream.
- Scatter additional berries.
- Sprinkle chocolate curls generously.
- Chill for 30 minutes before serving.
A refreshed top layer dramatically improves appearance even if the internal layers have softened slightly during transport.
Food Safety, Storage, Meal Prep & Serving Guidelines
Although this is a no-bake dessert, proper food safety is just as important as it is for cooked recipes. Since the trifle contains heavy whipping cream, dairy, and fresh fruit, careful handling helps preserve both flavor and freshness while reducing the risk of foodborne illness.
Food Safety Best Practices
- Handle ingredients only after washing your hands thoroughly with warm water and soap
- Sanitize countertops, cutting boards, knives, and mixing bowls before beginning.
- Wash all fresh berries under cool running water, then dry them completely with paper towels before layering.
- Keep heavy cream refrigerated until immediately before whipping.
- Use separate cutting boards if preparing this dessert alongside raw meat or seafood to avoid cross-contamination.
- If using homemade whipped cream, ensure all bowls and beaters are clean and chilled for the best texture and food safety.
Safe Temperature Guidelines
Unlike meat recipes, this dessert does not have an internal cooking temperature. Instead, temperature control during storage is essential.
- Ideal Serving Temperature: 38–42°F (3–6°C)
- Keep desserts refrigerated for no longer than 2 hours (or 1 hour if ambient temperature exceeds 90°F / 32°C).
- Refrigerate leftovers as soon as possible after serving.
Refrigerator Storage
Store the trifle tightly covered with plastic wrap or in an airtight container.
- Best Quality: Up to 2 days
- Safe to Eat: Up to 3 days, though the cake will soften further and the berries may release additional juices.
Freezing
Freezing is not recommended for the fully assembled trifle because:
- Whipped cream may separate when thawed.
- Fresh berries lose their firm texture.
- Cake layers can become mushy.
If you wish to prepare ahead, freeze only the chocolate cake and make the mousse and whipped cream fresh before assembly.
Meal Prep Tips
This recipe is an excellent make-ahead dessert.
For the freshest results:
- Bake or purchase the chocolate cake 1–2 days in advance.
- Wash and dry berries the day before serving.
- Prepare the chocolate mousse up to 24 hours ahead.
- Assemble the trifle 4–8 hours before serving to allow the flavors to meld while maintaining distinct layers.
Serving Leftovers
Use a clean serving spoon each time to avoid introducing bacteria or excess moisture into the dessert. Cover the trifle immediately after serving and return it to the refrigerator.
Nutrition & Dietary Considerations
The following nutritional information is an estimate per serving (based on 12 servings) and may vary depending on the brands of ingredients used.
| Nutrient | Approximate Amount |
| Calories | 430 kcal |
| Protein | 6 g |
| Carbohydrates | 43 g |
| Dietary Fiber | 4 g |
| Total Sugars | 30 g |
| Total Fat | 26 g |
| Saturated Fat | 15 g |
| Cholesterol | 80 mg |
| Sodium | 180 mg |
| Calcium | 90 mg |
| Iron | 2 mg |
Dietary Notes
- Vegetarian: Yes
- Gluten-Free: Only if using certified gluten-free chocolate cake and ingredients.
- Nut-Free: Naturally nut-free unless nuts are added as a garnish.
- Dairy-Free: Substitute dairy-free whipping cream and dairy-free chocolate.
- Egg-Free: Possible if using an egg-free chocolate cake.
Portion Guidance
This dessert is rich and satisfying. A serving of approximately 1 cup (about 220–240 g) provides a balanced portion for most guests. Pairing it with fresh fruit or coffee can help round out the dessert experience without feeling overly heavy.
Pairings & Serving Suggestions
One of the reasons this recipe consistently ranks among our favorite party dessert recipes is its versatility. Whether served at a casual family gathering or a formal celebration, it pairs beautifully with a wide range of foods and beverages.
Fresh Fruit Pairings
Balance the rich chocolate with:
- Fresh strawberries
- Raspberries
- Blueberries
- Blackberries
- Sliced kiwi
- Orange segments
- Cherries (seasonal)
These fruits enhance the dessert’s natural brightness and provide additional color on the serving table.
Dessert Accompaniments
For an elegant dessert buffet, serve the trifle alongside:
- Mini brownies
- Chocolate-dipped strawberries
- Vanilla shortbread cookies
- French macarons
- Biscotti
- Chocolate wafer cookies
Offering a variety of textures allows guests to customize each bite.
Beverage Pairings
The creamy chocolate and berry flavors pair wonderfully with:
- Freshly brewed coffee
- Espresso
- Cappuccino
- Hot chocolate
- Black tea
- Earl Grey tea
- Mint tea
- Sparkling water with lemon
- Cold milk
For adult celebrations, many hosts also enjoy pairing chocolate desserts with dessert wines or sparkling beverages, though non-alcoholic options are equally delicious.
Presentation Ideas
For a memorable display:
- Serve in a large glass trifle bowl to showcase the beautiful layers.
- Garnish with chocolate curls, fresh berries, and mint leaves just before serving.
- For weddings, showers, or elegant dinner parties, assemble individual portions in clear dessert glasses or mason jars for a refined presentation.
Final Verdict & Reader Invitation
If you’re searching for reliable party dessert recipes that are beautiful, crowd-pleasing, and surprisingly easy to prepare, this No-Bake Chocolate Berry Trifle deserves a place in your recipe collection. Its luxurious layers of moist chocolate cake, airy mousse, fresh berries, and whipped cream create a dessert that’s both visually stunning and irresistibly delicious. Best of all, it’s make-ahead friendly, easy to customize, and perfect for birthdays, holidays, potlucks, and family celebrations.
Why This Is One of the Best Party Dessert Recipes
We hope this recipe becomes a favorite in your kitchen as it has in ours at DaliyDelish.com. If you try it, we’d love to hear about your experience! Leave a ⭐⭐⭐⭐⭐ rating, share your tips or creative variations in the comments, and let us know how you served it. Your feedback helps other readers create unforgettable desserts and inspires us to keep sharing trusted, kitchen-tested recipes.
Yes. In fact, preparing the trifle one day in advance often improves the flavor because the cake absorbs moisture from the mousse and whipped cream while the layers have time to set. Add the final berry garnish and chocolate curls shortly before serving for the freshest appearance.
Fresh berries are strongly recommended because they maintain their shape and texture. Frozen berries release significantly more liquid as they thaw, which can make the dessert watery and soften the cake layers more quickly. If frozen berries are your only option, thaw them completely and drain off excess liquid before use.
A 60–70% dark chocolate offers the ideal balance of cocoa flavor and sweetness. High-quality chocolate melts more smoothly and creates a richer, silkier mousse than chocolate-flavored baking bars or candy coatings.
Assemble the trifle in a sturdy glass or acrylic bowl with a secure lid or tightly wrapped plastic wrap. Keep it chilled in an insulated cooler with ice packs during transport, especially in warm weather. Once you arrive, refrigerate the dessert until it’s time to serve to maintain its texture and freshness.

Tosique Haider -Passionate writer sharing informative, engaging, and easy-to-read articles across different topics. Focused on delivering valuable content that helps readers learn, explore, and stay inspired every day.