Introduction
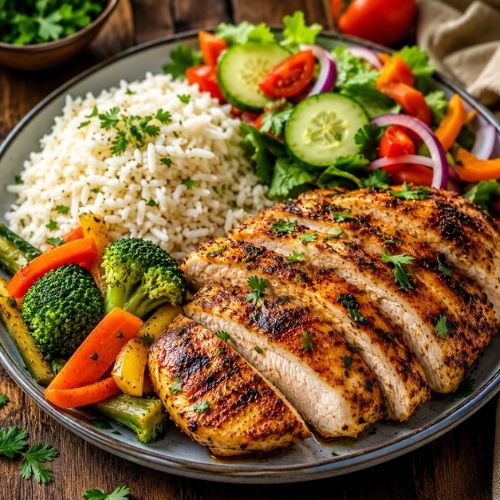
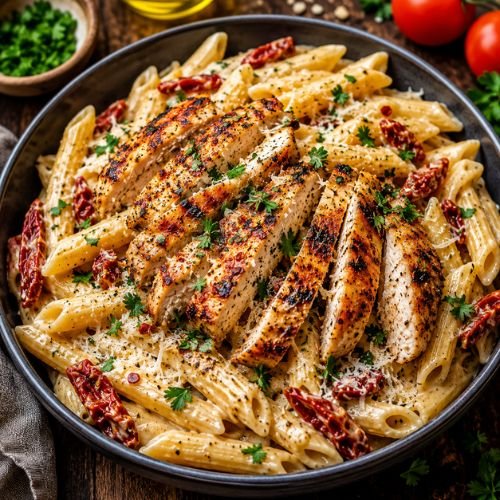
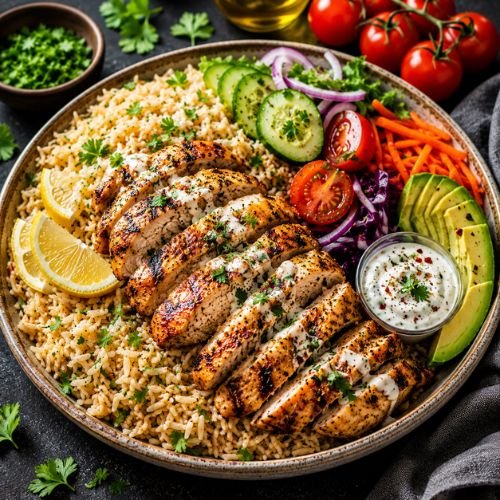
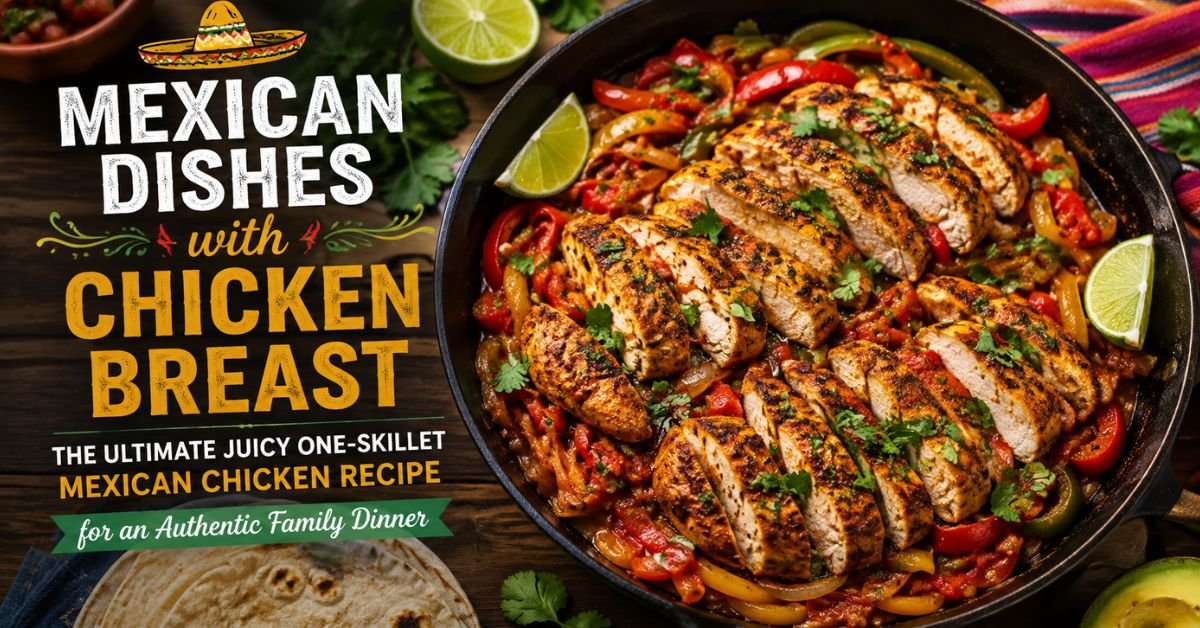
Few meals capture the bold, comforting spirit of Mexican-inspired home cooking quite like juicy chicken breast simmered in a rich tomato and pepper sauce infused with smoky spices, garlic, and fresh lime. If you’re searching for the best mexican dishes with chicken breast, this recipe delivers restaurant-quality flavor using simple ingredients and reliable cooking techniques that work beautifully in a home kitchen.
The first thing you’ll notice is the irresistible aroma. As the chicken sears, the natural proteins caramelize, creating a rich golden crust with deep savory notes. Garlic and onions soften in the same skillet, releasing their sweetness while paprika, cumin, chili powder, and oregano bloom in warm oil. When diced tomatoes and chicken broth are added, the kitchen fills with a comforting fragrance that promises a satisfying meal.
Why You’ll Love This Mexican Chicken Breast Recipe
The finished chicken is incredibly tender and juicy. Every slice remains moist thanks to careful temperature control and a short resting period before serving. The sauce is balanced slightly smoky, mildly spicy, subtly tangy from fresh lime juice, and naturally sweet from tomatoes and onions. Fresh cilantro brightens the entire dish, while melted cheese is an optional finishing touch for extra richness.
At DaliyDelish.com, this recipe went through multiple kitchen tests using different brands and sizes of chicken breasts. One challenge many home cooks face is dry chicken. Through repeated testing, we found that pounding the chicken to an even thickness, avoiding excessively high heat, and cooking only until the thickest part reaches an internal temperature of 165°F (74°C) consistently produced juicy, flavorful results.
Another goal was versatility. This recipe works wonderfully for tacos, burritos, rice bowls, salads, enchiladas, quesadillas, and meal prep lunches. Whether you’re preparing a quick weeknight dinner or entertaining guests, it offers authentic Mexican-inspired flavors without requiring specialty ingredients or complicated techniques.
Most importantly, every ingredient has a purpose. Each spice contributes depth, every cooking step enhances flavor, and every technique is designed to help home cooks achieve dependable, delicious results on the very first attempt.
Recipe Quick Facts Summary Card
| Detail | Information |
| Preparation Time | 15 minutes |
| Cook Time | 25 minutes |
| Total Time | 40 minutes |
| Skill Level | Beginner to Intermediate |
| Servings | 4 |
| Estimated Calories | Approximately 410 calories per serving |
| Estimated Cost | Around $3.75–$4.75 per serving (varies by location) |
| Primary Diet Type | High-Protein, Gluten-Free (when served with gluten-free sides) |
Why This Recipe Works (EEAT Value Points)
This recipe is more than just another chicken dinner. It has been carefully developed using professional culinary techniques that maximize flavor while remaining approachable for everyday cooks.
• Even Thickness Creates Even Cooking
One of the biggest reasons chicken breasts become dry is uneven thickness. By gently pounding each breast to approximately ¾ inch (2 cm) thick, the meat cooks evenly from edge to center. This minimizes overcooking and helps preserve moisture.
• Layering Flavors Builds Restaurant-Quality Taste
Instead of mixing all ingredients together at once, flavors are developed in stages. Chicken is first browned, aromatics are sautéed, spices are toasted briefly, and the sauce is built afterward. This gradual process creates significantly greater depth than simply simmering everything together.
• Pantry-Friendly Yet Authentic
Many authentic Mexican flavors come from common pantry staples including cumin, oregano, garlic, tomatoes, onions, and chili powder. Fresh lime juice and cilantro provide brightness without requiring difficult-to-find ingredients.
• Excellent for Weekly Meal Prep
Because chicken breasts remain juicy after reheating when properly cooked, this recipe is ideal for meal prep.This dish can be portioned into containers with rice, roasted vegetables, black beans, and salad for several tasty lunches throughout the week.
• Flexible for Different Diets and Preferences
Families often have different dietary needs. This recipe can easily be customized by reducing sodium, increasing vegetables, using dairy-free toppings, or adjusting the spice level without compromising its overall flavor profile.
Kitchen Tools & Equipment Guide
Using the proper kitchen equipment helps create consistent results while reducing the risk of overcooking.
Large Cast-Iron Skillet or Heavy Stainless-Steel Pa
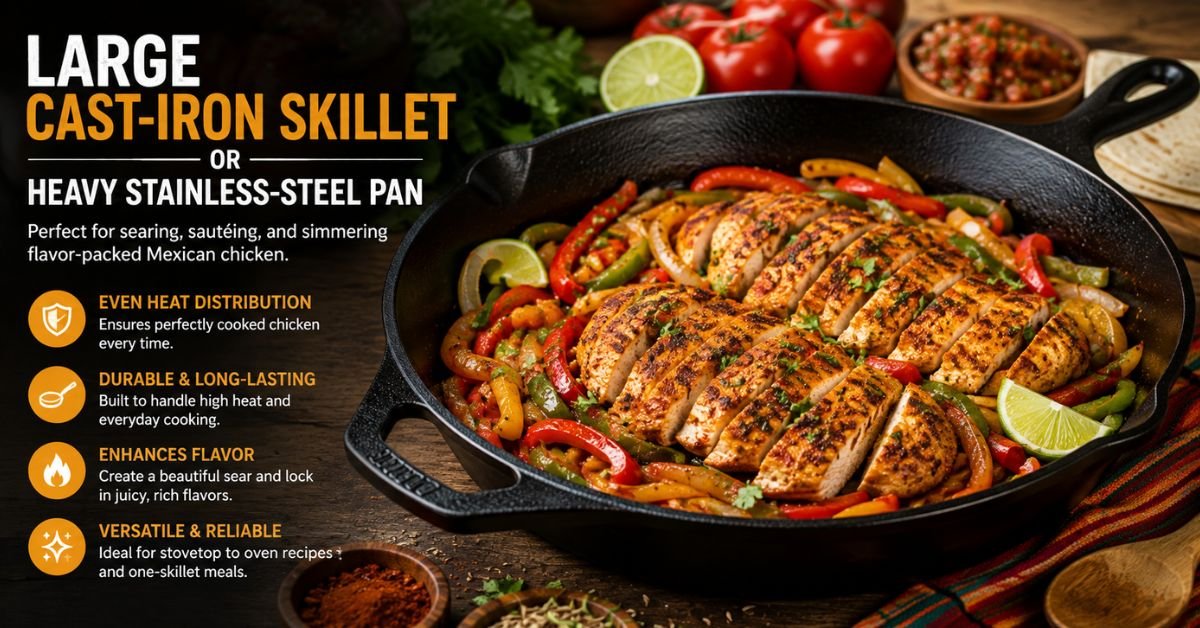
A heavy skillet retains heat evenly, encouraging proper browning and the Maillard reaction that creates rich, savory flavor.
Instant-Read Digital Thermometer
Perhaps the most valuable tool for cooking chicken breast. Checking the thickest portion ensures the chicken reaches 165°F (74°C) without drying out.
Sharp Chef’s Knife
A sharp knife produces cleaner cuts, improves safety, and makes preparing vegetables much easier.
Cutting Boards
Use separate cutting boards for raw poultry and vegetables to reduce cross-contamination and support safe food handling.
Meat Mallet or Rolling Pin
Flattening thicker portions of the chicken creates uniform cooking and better texture.
Measuring Spoons and Cups
Accurate spice measurements ensure balanced seasoning, especially when using bold flavors like cumin and chili powder.
Citrus Juicer
Extracting fresh lime juice is easier and more efficient with a handheld citrus press, maximizing both juice yield and flavor.
Ingredient Selection, Quality & Substitutions
High-quality ingredients make a noticeable difference in both flavor and texture. Below are the exact measurements for consistent results.
Main Ingredients
| Ingredient | US Measurement | Metric |
| Boneless skinless chicken breasts | 2 pounds | 900 g |
| Olive oil | 2 tablespoons | 30 ml |
| Yellow onion, diced | 1 medium | 150 g |
| Garlic, minced | 4 cloves | 20 g |
| Bell pepper, sliced | 1 large | 170 g |
| Diced tomatoes | 1 can (14.5 oz) | 410 g |
| Chicken broth | ½ cup | 120 ml |
| Tomato paste | 2 tablespoons | 30 g |
| Lime juice | 2 tablespoons | 30 ml |
| Fresh cilantro | ¼ cup chopped | 15 g |
Spice Blend
| Ingredient | US | Metric |
| Ground cumin | 2 teaspoons | 5 g |
| Chili powder | 2 teaspoons | 5 g |
| Smoked paprika | 1 teaspoon | 2.5 g |
| Mexican oregano | 1 teaspoon | 1 g |
| Onion powder | 1 teaspoon | 3 g |
| Garlic powder | 1 teaspoon | 3 g |
| Salt | 1 teaspoon (or to taste) | 6 g |
| Black pepper | ½ teaspoon | 1 g |
Optional Garnishes
- Fresh avocado slices
- Crumbled cotija cheese
- Shredded Monterey Jack or cheddar cheese
- Sour cream or plain Greek yogurt
- Pickled jalapeños
- Fresh cilantro leaves
- Lime wedges
Why These Ingredients Matter
Chicken Breasts: Choose fresh, plump, evenly sized chicken breasts with a light pink color and no strong odor. Uniform thickness ensures even cooking, while fresh meat retains more natural moisture than previously frozen cuts.
Olive Oil: A good-quality olive oil helps conduct heat evenly and promotes proper browning. For a more neutral flavor, avocado oil is an excellent alternative with a similarly high smoke point.
Onions and Garlic: These aromatic vegetables create the flavor foundation of the dish. Yellow onions offer balanced sweetness after sautéing, while freshly minced garlic provides a richer aroma than pre-minced varieties.
Bell Pepper: Red or yellow bell peppers contribute natural sweetness and vibrant color, balancing the smoky spices. Green bell peppers provide a slightly earthier flavor if preferred.
Diced Tomatoes and Tomato Paste: Tomatoes bring acidity and body to the sauce, while tomato paste deepens the flavor and creates a richer consistency without requiring long simmering.
Fresh Lime Juice: Freshly squeezed lime juice brightens the dish and balances the richness of the chicken and spices. Bottled juice can be used in a pinch, but fresh juice offers a cleaner, more vibrant flavor.
Cumin, Chili Powder, Smoked Paprika, and Mexican Oregano: These spices form the signature Mexican-inspired flavor profile. Toasting them briefly in the pan releases their essential oils, enhancing aroma and depth.
Tested Substitutions
- Dairy-Free: Omit cheese and sour cream, or use plant-based alternatives.
- Low-Sodium: Choose reduced-sodium chicken broth and canned tomatoes, and reduce added salt to taste.
- Keto-Friendly: Serve with cauliflower rice, sautéed peppers, or zucchini noodles instead of tortillas or rice.
- Extra Protein: Add black beans or pinto beans for additional fiber and plant-based protein, if desired.
- Spicier Version: Incorporate diced chipotle peppers in adobo sauce or a finely chopped jalapeño during the sautéing stage.
- Chicken Thighs: Boneless, skinless chicken thighs can replace breasts for a richer flavor and slightly more forgiving cooking time.
(Part 1 Complete Part 2 will cover the complete Culinary Masterclass with detailed cooking steps, the science of flavor, common mistakes, and food safety, storage, meal prep, and reheating.)
You have not enough Humanizer words left. Upgrade your Surfer plan
Culinary Masterclass: Step-by-Step Instructions
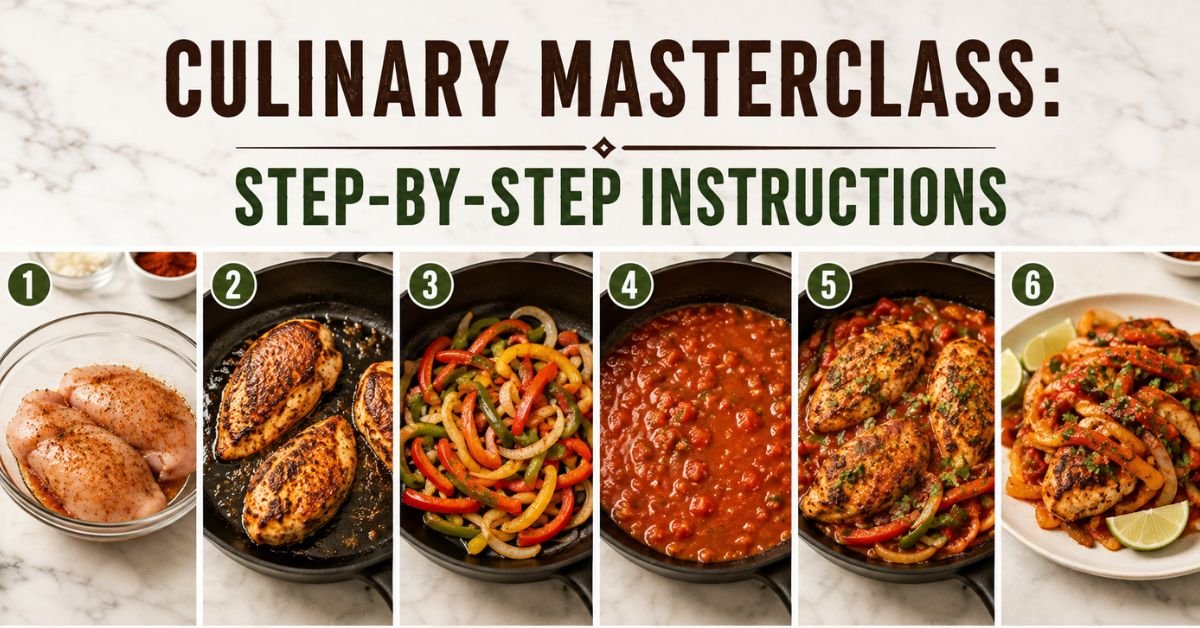
This recipe has been tested multiple times in the DaliyDelish.com kitchen to ensure reliable, repeatable results. Follow each step carefully, paying attention to the visual, aromatic, and temperature cues rather than relying only on the clock. These chef-style observations help produce juicy chicken and a deeply flavorful sauce every time.
Step 1: Prep Work & Seasoning
Begin by removing the chicken breasts from the refrigerator 20–30 minutes before cooking. Allowing the meat to lose some of its chill encourages more even cooking.
If one end of the breast is significantly thicker than the other, place it between two sheets of plastic wrap or parchment paper and gently pound it using a meat mallet or rolling pin until it reaches an even ¾ inch (2 cm) thickness. Avoid pounding too aggressively, which can damage the muscle fibers and affect texture.
Pat each chicken breast completely dry using paper towels. Moisture on the surface creates steam instead of browning, reducing flavor development.
In a small bowl, combine:
- 2 teaspoons ground cumin
- 2 teaspoons chili powder
- 1 teaspoon smoked paprika
- 1 teaspoon Mexican oregano
- 1 teaspoon onion powder
- 1 teaspoon garlic powder
- 1 teaspoon kosher salt
- ½ teaspoon freshly ground black pepper
Rub the seasoning mixture evenly over every surface of the chicken. Massage the spices into the meat with your hands for complete coverage.
While the chicken rests with the seasoning, dice the onion, slice the bell pepper, mince the garlic, chop the cilantro, cut fresh lime wedges, and measure all remaining ingredients.
Professional kitchens call this preparation mise en place, meaning “everything in its place.” Organizing ingredients before turning on the stove prevents rushed cooking and helps avoid burning aromatics.
Step 2: Searing & Sautéing
Heat a large cast-iron skillet or heavy stainless-steel pan over medium-high heat for approximately 2–3 minutes.
Add 2 tablespoons (30 ml) olive oil.
The oil should shimmer but should not smoke heavily.
Do not overcrowd the pan when putting the chicken in.
The moment the chicken touches the skillet, you should hear a confident sizzle. That sound indicates proper pan temperature.
Cook without moving the chicken for 4–5 minutes.
Avoid repeatedly lifting or flipping it. Leaving the chicken undisturbed allows a flavorful golden crust to develop through the Maillard reaction.
When ready to flip, the chicken should naturally release from the pan with very little resistance.
Turn the chicken and cook the second side another 4–5 minutes.
The surface should display a rich golden-brown color not burnt black.
Transfer the chicken to a clean plate. At this stage it may not yet be fully cooked internally, which is perfectly fine because it will finish cooking in the sauce.
Reduce the heat to medium.
Without washing the skillet, add:
- diced onion
- sliced bell pepper
Cook for 4–5 minutes, stirring occasionally.
The vegetables should soften while developing slight caramelization around the edges.
Add minced garlic.
Cook only 30–45 seconds until fragrant.
Avoid browning the garlic too deeply, as burnt garlic develops bitterness.
Step 3: Sauce Building & Simmering
Push the vegetables slightly toward one side of the skillet.
Add:
- 2 tablespoons tomato paste
Cook the tomato paste for about 1 minute.
As a result of this step, raw flavors are removed as well as sweetness and richness are concentrated.
Next, sprinkle in an additional pinch of cumin and smoked paprika if desired.
Toast the spices for approximately 20 seconds until fragrant.
Pour in:
- ½ cup chicken broth
- 1 can diced tomatoes
Using a wooden spoon, scrape the browned bits from the bottom of the skillet.
Those caramelized bits known as fond contain concentrated flavor and should never be wasted.
Stir until the sauce becomes smooth and evenly combined.
Approximately five minutes should be enough time for the sauce to simmer gently.
It should thicken slightly while maintaining enough moisture for the chicken.
Taste the sauce.
Adjust seasoning if necessary by adding:
- additional salt
- black pepper
- chili powder
- lime juice
Return the seared chicken along with any accumulated juices back into the skillet.
Spoon sauce over each chicken breast.
Reduce heat to low.
Cover partially with a lid.
It may take between 8 and 12 minutes for everything to simmer gently, depending on the thickness of the chicken.
The thickest part of the belly should be inserted with an instant-read thermometer.
In order for the chicken to be safely cooked, it must reach the following temperatures:
165°F (74°C)
Do not continue cooking well beyond this point.
Overcooking is the primary reason chicken breasts become dry.
Step 4: Finishing, Resting & Garnishing
Remove the skillet from the heat immediately after the chicken reaches its target temperature.
Transfer the chicken to a cutting board or warm serving platter.
Allow it to rest for 5 minutes.
Resting allows the muscle fibers to relax and reabsorb juices instead of losing them when sliced.
Meanwhile, stir fresh lime juice into the sauce.
Taste once more.
If needed, balance flavors using:
- extra lime for acidity
- pinch of salt for depth
- small pinch of sugar if tomatoes taste overly acidic
Slice the chicken across the grain into thick strips or serve whole.
Spoon generous amounts of the rich tomato-pepper sauce over each portion.
Finish with:
- chopped fresh cilantro
- sliced avocado
- cotija cheese
- shredded Monterey Jack
- jalapeño slices
- sour cream or Greek yogurt
- lime wedges
The finished dish should display vibrant colors:
- deep red sauce
- golden chicken
- bright green cilantro
- creamy avocado
The chicken should feel firm yet springy when pressed lightly, never rubbery or dry.
Every bite should offer smoky spices, juicy meat, gentle acidity, subtle sweetness, and fresh herbal brightness.
The Science of Flavor & Chef’s Insider Techniques
Professional chefs rely on food science—not luck—to create memorable meals. Understanding these principles allows home cooks to consistently prepare juicy, flavorful chicken with confidence.
The Maillard Reaction Creates Deep Flavor
The golden crust that develops during searing is the result of the Maillard reaction, a chemical process that occurs when proteins and natural sugars are exposed to high heat. This reaction creates hundreds of complex flavor compounds responsible for the rich, savory notes associated with expertly cooked meat.
To maximize browning:
- Pat the chicken dry before seasoning.
- Preheat the pan thoroughly.
- Avoid overcrowding the skillet, as excess moisture lowers the pan temperature and causes steaming instead of searing.
- Let the chicken release naturally before flipping.
Pan Temperature Control Matters
Maintaining a consistent medium-high heat is essential. A pan that’s too cool prevents browning, while excessive heat can burn spices before the chicken cooks through. After searing, reducing the heat for the sauce allows flavors to develop gently without scorching.
Blooming Spices Unlocks Aroma
Ground spices contain flavorful oils that become more aromatic when briefly heated in fat. Toasting cumin, chili powder, and smoked paprika for 20–30 seconds in the pan intensifies their fragrance and distributes their flavor evenly throughout the sauce. Be careful not to over-toast them, as burnt spices develop bitterness.
Resting the Chicken Preserves Juiciness
As chicken cooks, moisture is pushed toward the center of the meat. RestingIt is best to let the breast rest for 5 minutes after cooking to let the juices redistribute. Cutting too soon causes flavorful juices to spill onto the cutting board instead of staying in the meat.
Balance Richness with Fresh Acidity
The rich flavors from seared chicken, olive oil, and tomato paste are balanced by a finishing squeeze of fresh lime juice. This acidity brightens the overall flavor profile without overpowering the smoky spices. Fresh cilantro adds another layer of freshness that complements the dish beautifully.
Common Cooking Mistakes & Troubleshooting Guide
Even experienced cooks occasionally encounter problems. Understanding these common issues and how to fix them helps ensure consistent results every time.
Mistake 1: Dry, Overcooked Chicken
Why it happens: Chicken breasts are lean and cook quickly. Leaving them on the heat too long causes moisture loss, resulting in a dry, fibrous texture.
How to prevent it: Use an instant-read thermometer and remove the chicken as soon as it reaches 165°F (74°C). Allow it to rest before slicing to retain its juices.
Mistake 2: Weak or Bland Flavor
Why it happens: Under-seasoning, skipping spice blooming, or not tasting the sauce before serving can leave the dish flat.
How to fix it: Season the chicken generously, toast the spices briefly in oil, and adjust the sauce at the end with salt, lime juice, or a pinch of cumin if needed.
Mistake 3: Thin, Watery Sauce
Why it happens: Too much liquid or not allowing the sauce to simmer long enough prevents proper reduction.
How to fix it: Simmer uncovered for a few extra minutes until the sauce thickens naturally. Stir occasionally to prevent sticking. Avoid adding flour or cornstarch unless absolutely necessary. Mistake 4: Burnt Garlic or Spices
Why it happens: Garlic and ground spices cook very quickly and can burn if exposed to high heat for too long.
How to prevent it: Lower the heat before adding garlic, cook it only until fragrant, and toast the spices for just 20–30 seconds before adding the liquids. If they burn, it’s best to start that step over, as bitterness can affect the entire dish.
Food Safety, Storage, Meal Prep & Reheating
Safe food handling is just as important as great flavor. Following proper storage and reheating practices helps preserve both quality and food safety.
Food Safety Essentials
- Cook chicken to a minimum internal temperature of 165°F (74°C), measured at the thickest part with an instant-read thermometer.
- Use separate cutting boards and utensils for raw poultry and ready-to-eat ingredients to prevent cross-contamination.
- Wash your hands thoroughly with soap and warm water after handling raw chicken.
- Never place cooked chicken back on the same plate that held it raw unless the plate has been washed.
Storage
Allow leftovers to cool for no more than 2 hours before refrigerating.
Airtight containers are ideal for storing chicken and sauce.
- Refrigerator: Up to 4 days
- Freezer: Up to 3 months
For freezing, portion the chicken with sauce into individual meal-sized containers. Thaw overnight in the refrigerator before reheating for the best texture.
Meal Prep Tips
This recipe is ideal for weekly meal prep. Pair portions with:
- cilantro-lime rice
- brown rice
- cauliflower rice
- black beans
- roasted vegetables
- mixed greens
Keeping the sauce with the chicken helps retain moisture during reheating.
Reheating
For the best results, reheat gently in a covered skillet over medium-low heat, adding a splash of chicken broth if the sauce has thickened too much. Alternatively, microwave individual portions in short intervals, stirring the sauce between each burst to heat evenly. Avoid overheating, as this can dry out the chicken.
Nutrition & Dietary Considerations
The following nutrition values are estimates for one serving (¼ of the recipe) and may vary depending on the exact ingredients, brands, and portion sizes used.
| Nutrient | Approximate Amount Per Serving |
| Calories | 410 kcal |
| Protein | 42 g |
| Carbohydrates | 12 g |
| Dietary Fiber | 3 g |
| Total Fat | 20 g |
| Saturated Fat | 4 g |
| Cholesterol | 120 mg |
| Sodium | 620 mg* |
| Potassium | 880 mg |
| Vitamin C | 65% DV |
| Vitamin A | 28% DV |
| Iron | 12% DV |
| Calcium | 8% DV |
*Sodium content varies depending on the chicken broth, canned tomatoes, and seasoning used.
Why This Recipe Fits a Balanced Diet
Chicken breast is naturally rich in high-quality complete protein, making it an excellent option for supporting muscle maintenance, post-workout recovery, and everyday satiety. Each serving delivers more than 40 grams of protein while remaining relatively moderate in calories.
Bell peppers, onions, tomatoes, garlic, and fresh cilantro contribute vitamins, minerals, antioxidants, and dietary fiber that help create a nutritionally balanced meal. Although vegetables should not be viewed as cures or treatments for medical conditions, they are valuable components of a healthy eating pattern.
Dietary Modifications
This recipe is easy to customize for different lifestyles:
- Gluten-Free: Naturally gluten-free when served with gluten-free tortillas, rice, or vegetables.
- Low-Carb: Pair with cauliflower rice, sautéed zucchini, roasted broccoli, or a fresh salad instead of rice or tortillas.
- High-Protein: Increase the chicken portion or add grilled shrimp for additional lean protein.
- Lower Sodium: Use reduced-sodium chicken broth, canned tomatoes without added salt, and adjust seasoning to taste.
- Make this recipe dairy-free by skipping the cheese and sour cream, or substituting dairy-free alternative ingredients.
For personalized nutrition advice, especially if you have a medical condition or dietary restriction, consult a registered dietitian or healthcare professional.
Pairings & Serving Suggestions
One reason this recipe ranks among the most versatile mexican dishes with chicken breast is that it can be served in many delicious ways. Whether you’re preparing a casual family dinner or hosting friends, the flavorful chicken adapts beautifully to different meals.
Classic Mexican-Inspired Pairings
Serve the chicken over cilantro-lime rice to absorb the rich tomato sauce. Add a side of seasoned black beans or pinto beans for extra protein and fiber, then finish with sliced avocado and a squeeze of fresh lime.
Warm corn tortillas or flour tortillas transform the chicken into flavorful tacos. Top with shredded lettuce, pico de gallo, cotija cheese, and fresh cilantro for added texture and freshness.
Fresh Side Dishes
Balance the smoky flavors with lighter accompaniments such as:
- Mexican street corn (elote-inspired)
- Crisp cabbage slaw with lime vinaigrette
- Fresh tomato and cucumber salad
- Grilled zucchini and peppers
- Avocado and corn salad
- Mixed greens with citrus dressing
These sides provide refreshing contrast while keeping the meal colorful and satisfying.
Family-Friendly Serving Ideas
This chicken also works wonderfully in:
- Burrito bowls
- Quesadillas
- Enchiladas
- Nachos
- Stuffed baked potatoes
- Mexican-style pasta salad
- Lettuce wraps
- Meal-prep lunch bowls
Its versatility makes it ideal for using leftovers creatively throughout the week.
Beverage Pairings
For a refreshing finish, serve with:
- Sparkling water flavored with fresh lime
- Unsweetened iced tea
- Homemade lemonade
- Agua fresca made with watermelon or cucumber
- Fresh fruit smoothies
These beverages complement the smoky spices without overwhelming the meal.
Final Verdict & Reader Invitation
If you’re searching for flavorful, dependable mexican dishes with chicken breast, this chef-tested recipe deserves a permanent place in your meal rotation. It combines tender, juicy chicken with bold Mexican-inspired spices, a rich tomato-pepper sauce, and fresh finishing touches that make every bite satisfying. Best of all, it’s simple enough for busy weeknights while impressive enough for family gatherings and casual entertaining.
Why This Mexican Chicken Breast Recipe Deserves a Spot on Your Dinner Table
What did you think of the recipe? Let us know! Leave a ★★★★★ rating, share your cooking tips, substitutions, or favorite side dishes in the comments on DaliyDelish.com, and let us know how you made this recipe your own. Your feedback helps other home cooks and inspires future recipes from our kitchen. Happy cooking!
Absolutely. Boneless, skinless chicken thighs are an excellent substitute if you prefer slightly richer flavor and a more forgiving cut of meat. Because thighs contain more natural fat, they tend to remain juicy even with a few extra minutes of cooking. Continue cooking until the thickest portion reaches a safe internal temperature of 165°F (74°C).
As written, this recipe is considered mild to medium in heat. The chili powder contributes warmth rather than intense spiciness. If you enjoy more heat, add diced jalapeños, chipotle peppers in adobo sauce, or a pinch of cayenne pepper. For a milder version, reduce the chili powder slightly and omit any additional spicy ingredients.
Yes. This dish is ideal for meal prep because the flavors continue to develop after resting. Prepare the recipe up to four days in advance, store it in airtight containers in the refrigerator, and reheat gently with a splash of chicken broth or water to maintain moisture.
The most reliable method is to pound the chicken to an even thickness, sear it over medium-high heat, and monitor the internal temperature with an instant-read thermometer. Remove the chicken from the heat as soon as it reaches 165°F (74°C), then let it rest for five minutes before slicing. This process helps retain the natural juices and prevents the meat from becoming dry.

Tosique Haider -Passionate writer sharing informative, engaging, and easy-to-read articles across different topics. Focused on delivering valuable content that helps readers learn, explore, and stay inspired every day.