

Introduction
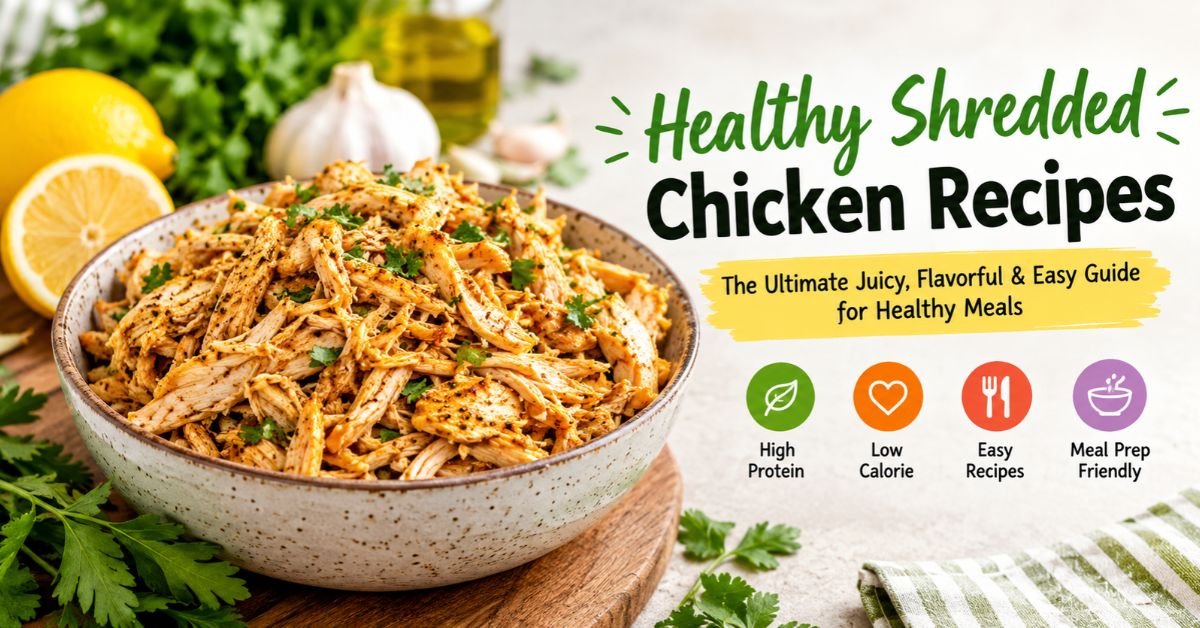
Healthy shredded chicken recipes are a practical way to prepare delicious, protein rich meals without relying on heavy sauces, excessive oil, or complicated cooking techniques. Whether you need a quick lunch, a satisfying family dinner, or a convenient ingredient for weekly meal preparation, tender shredded chicken offers the flexibility to create countless flavorful dishes from a few everyday ingredients.
This recipe combines tender chicken breast, fresh garlic, lemon juice, low sodium chicken broth, and a balanced blend of herbs and spices. The result is chicken that tastes savory, slightly citrusy, and aromatic, with enough moisture to work beautifully in salads, wraps, grain bowls, tacos, and comforting soups.
As the chicken cooks, garlic releases its distinctive fragrance, while paprika adds gentle warmth and an appealing golden color. Lemon juice brightens the savory broth, and the herbs contribute a fresh, rounded flavor. Once cooked and shredded, the chicken should separate easily into soft, moist strands rather than breaking into dry, stringy pieces.
At DaliyDelish.com, the goal of this recipe is to help home cooks solve a common kitchen problem: making healthy shredded chicken that remains flavorful and tender even after reheating. Plain boiled chicken can become bland, while overcooked chicken breast often loses moisture. This method addresses both issues by combining gentle simmering, careful temperature monitoring, and a short resting period before shredding.
The recipe is also adaptable. You can keep it naturally gluten free by choosing suitable broth and seasonings, reduce the sodium by adjusting the salt, or use chicken thighs for a richer texture. Furthermore, the finished chicken can become the foundation for several meals throughout the week.
Instead of preparing a different protein for every dish, cook one versatile batch and transform it into fresh, satisfying meals with vegetables, whole grains, beans, or your favorite homemade sauces.
Recipe Quick Facts Summary Card
- Prep Time: 10 minutes
- Cook Time: 25–35 minutes
- Total Time: 35–45 minutes
- Skill Level: Beginner friendly
- Servings: 4
- Estimated Calories: 220–250 per serving
- Estimated Cost: 1.50–3.00 per serving
- Primary Diet Type: High protein, gluten free adaptable
Nutrition and cost are estimates. Actual values depend on ingredient brands, portion sizes, and local prices.
Why This Recipe Works (EEAT Value Points)
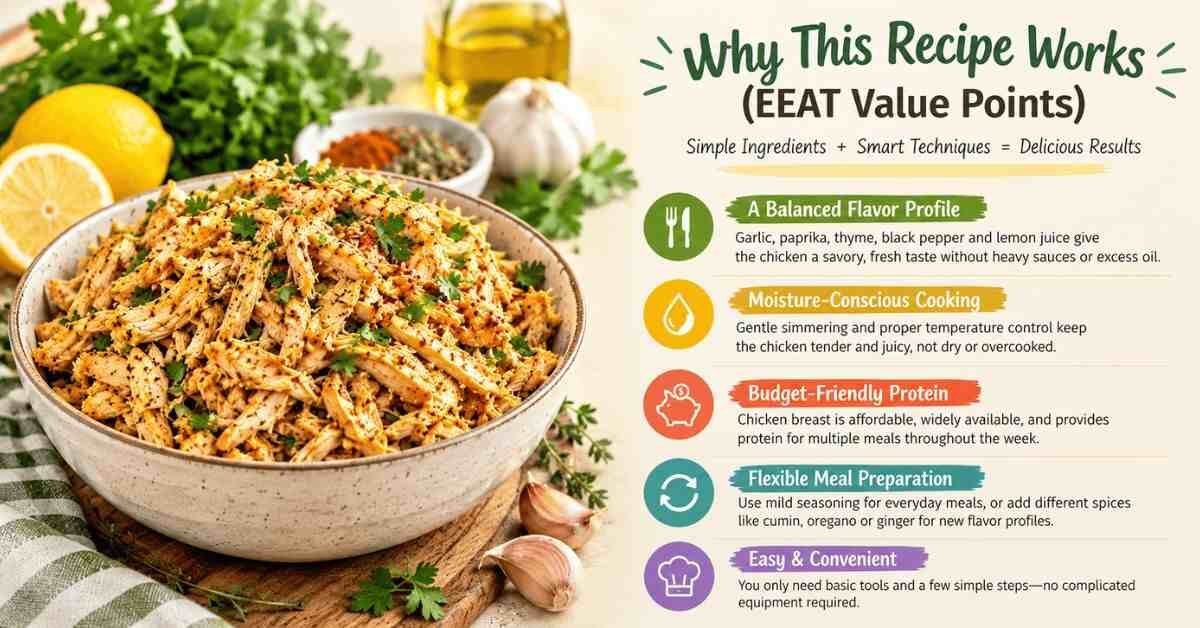
Healthy shredded chicken should be more than cooked poultry pulled apart with two forks. The best results come from combining good ingredient choices with a cooking method that protects moisture and builds flavor.
A balanced flavor profile: Garlic, paprika, thyme, black pepper, and lemon juice give the chicken a savory foundation with a refreshing finish. Instead of depending on heavy cream or large amounts of oil, the recipe develops flavor through seasoning, broth, and aromatics.
Moisture conscious cooking: Chicken breast contains relatively little fat, so it can dry out when exposed to excessive heat. Gentle simmering in a covered pan helps reduce moisture loss. Monitoring the internal temperature also prevents unnecessary overcooking.
A practical, budget friendly protein: Chicken breast is widely available, and a batch can supply the protein component for several different meals. Serve it with rice and vegetables one evening, then use the leftovers in wraps or soup the next day.
Flexible meal preparation: The chicken can be seasoned mildly so it works with different cuisines. Add cumin and chili for tacos, oregano for Mediterranean bowls, or ginger and garlic for an Asian inspired stir fry.
Convenient preparation without complicated equipment: You only need a cutting board, a sharp knife, a heavy pan with a lid, and a thermometer. Two forks or a hand mixer can then make shredding quick and straightforward.
The central advantage is consistency. Once you understand how to season, simmer, rest, and shred chicken properly, you can repeat the method with small variations to create an entire collection of healthy shredded chicken recipes.
Kitchen Tools & Equipment Guide
The right equipment makes this recipe easier and helps you achieve a consistent texture.
Heavy skillet or sauté pan with a lid: A deep, heavy bottomed pan distributes heat more evenly than a thin pan. Choose one large enough to hold the chicken in a mostly single layer.
Instant read food thermometer: This is the most reliable way to check doneness. Chicken must reach an internal temperature of 165°F (74°C) in the thickest part.
Sharp chef’s knife and cutting board: Use these for preparing garlic, lemon, parsley, and any vegetables you plan to serve. Keep raw chicken separate from ready to eat ingredients.
Measuring spoons and liquid measuring cup: Accurate measurements help maintain a balanced seasoning profile and prevent the broth from becoming too salty.
Two forks or a hand mixer: Two forks provide good control over the shredded texture. A hand mixer on low speed is convenient when preparing a larger batch.
Citrus juicer: Fresh lemon juice provides a brighter, more aromatic flavor than many bottled alternatives.
A Dutch oven is also suitable if you want to double the recipe. However, avoid overcrowding the pan because uneven heat can make the cooking process less predictable.
Ingredient Selection, Quality & Substitutions
This recipe uses simple ingredients that work together to produce tender chicken with a savory, citrus forward flavor.
Complete Ingredient List
Ingredients for 4 servings:
- Boneless, skinless chicken breasts: 1.5 lb (680 g)
- Low sodium chicken broth: 1 cup (240 ml)
- Extra virgin olive oil: 1 tablespoon (15 ml)
- Fresh garlic, minced: 4 cloves (about 12 g)
- Fresh lemon juice: 2 tablespoons (30 ml)
- Paprika: 1 teaspoon (2.3 g)
- Dried thyme: 1 teaspoon (1 g)
- Onion powder: 1 teaspoon (2.4 g)
- Ground black pepper: ½ teaspoon (about 1 g)
- Salt: ¼ teaspoon (about 1.5 g), or to taste
- Fresh parsley, chopped: 2 tablespoons (about 8 g)
Choosing Quality Chicken
Choose fresh chicken breasts that look moist but are not excessively wet or discolored. They should have a mild smell rather than a strong or unpleasant odor. Keep raw chicken refrigerated until preparation, and follow the package’s use by guidance.
Chicken breasts that are similar in thickness cook more evenly. If one piece is particularly thick, gently flatten the thicker portion to create a more uniform shape. This simple step reduces the chance of having one piece overcooked while another remains underdone.
Boneless, skinless breasts are convenient and relatively lean. However, boneless, skinless thighs are an excellent alternative when you prefer richer flavor and a slightly more forgiving texture.
Understanding the Aromatics and Seasonings
Garlic creates a savory base. Fresh minced garlic offers a stronger, more complex aroma than garlic powder, although powder works in a pinch.
Paprika adds gentle sweetness, color, and mild warmth. Smoked paprika creates a deeper flavor without requiring additional fat.
Thyme and onion powder provide savory depth. Dried thyme is convenient, while fresh thyme can be used in a slightly larger quantity.
Lemon juice balances the savory ingredients with acidity. Add it toward the end of cooking for a fresher citrus character.
Low sodium chicken broth supplies moisture and helps carry the seasonings throughout the chicken. Choose a broth with a short ingredient list and a sodium level that suits your dietary needs.
Olive oil helps distribute the seasonings and prevents the aromatics from sticking during the initial sauté.
Safe and Practical Substitutions
- Dairy free: The recipe is naturally dairy free when prepared with the listed ingredients.
- Lower sodium: Use unsalted broth, reduce or omit added salt, and increase the herbs, garlic, and lemon for flavor.
- Keto friendly: The chicken itself is low in carbohydrates. Check the broth and seasoning labels, and serve with low carbohydrate vegetables.
- Gluten free: Choose broth and seasonings labeled gluten free when necessary.
- Fresh herb alternative: Replace dried thyme with approximately 1 tablespoon of fresh thyme leaves.
- Chicken thigh alternative: Use approximately 680 g of boneless, skinless thighs. Check every piece for an internal temperature of 165°F (74°C).
For the best balance, avoid changing too many ingredients at once. Make one substitution, taste the finished chicken, and adjust the seasoning as needed.
Culinary Masterclass: Step by Step Instructions
The secret to delicious healthy shredded chicken is to develop flavor early, cook the meat gently, and shred it while it is still warm. Follow these steps for consistent results.
Step 1: Prep Work & Seasoning
Begin by measuring all the ingredients before heating the pan. This preparation keeps the cooking process organized and prevents garlic or spices from burning while you search for the next ingredient.
Pat the chicken breasts dry with paper towels if they have excess surface moisture. Do not rinse raw chicken, as splashing water can spread bacteria around the sink and nearby surfaces.
In a small bowl, combine the paprika, dried thyme, onion powder, black pepper, and salt. Sprinkle the mixture evenly over both sides of the chicken, gently pressing it onto the surface.
Next, mince the garlic and chop the parsley. Juice the lemon and set the ingredients aside separately.
If your chicken breasts are uneven in thickness, gently flatten the thickest parts. The aim is not to make them paper thin; instead, create a more uniform shape so they cook at a similar rate.
Wash your hands after handling raw chicken, and clean any utensils or surfaces that have touched it before using them for other ingredients.
Sensory checkpoint: The seasoned chicken should have an even reddish gold coating, with the earthy aroma of paprika and thyme becoming noticeable as you work.
Step 2: Searing & Sautéing
Place a heavy skillet over medium heat and add the olive oil. Allow the oil to warm until it flows easily across the pan. It should shimmer slightly but should not smoke.
Add the chicken in a single layer. If the pieces are too crowded, cook them in batches so that moisture does not accumulate excessively around the meat.
Let the chicken cook undisturbed for approximately 3–4 minutes on the first side. Depending on thickness and pan temperature, it may need a little longer. Look for a light golden surface and a gentle sizzling sound.
Turn the chicken and sear the second side for another 2–3 minutes. The goal is to develop flavor rather than fully cook the chicken during this stage.
Transfer the chicken temporarily to a clean plate if needed. Add the minced garlic to the pan and stir for about 20–30 seconds, just until fragrant. Avoid allowing the garlic to become dark brown because burnt garlic can taste bitter.
Pour in a small splash of broth and scrape the bottom of the skillet with a wooden spoon. This loosens the browned bits left by the chicken, adding savory depth to the cooking liquid.
Sensory checkpoint: You should smell warm garlic and toasted spices, and the pan should contain a few flavorful golden brown bits. If the garlic begins browning too quickly, lower the heat immediately.
Step 3: Sauce Building & Simmering
Return the chicken to the skillet and pour in the remaining chicken broth. The liquid should surround the chicken without necessarily covering it completely.
Bring the broth to a gentle simmer. Avoid a vigorous rolling boil, which can cause the surface of the chicken to tighten quickly and make temperature control more difficult.
Reduce the heat to medium low, cover the pan, and cook until the thickest part of each breast reaches 165°F (74°C). Depending on thickness, this may take approximately 12–20 minutes after the initial searing, although the thermometer—not the clock—determines when the chicken is safe.
Check each breast individually, inserting the thermometer into the thickest section without touching the pan. If one piece reaches the safe temperature before the others, remove it to a clean plate while the remaining chicken continues cooking.
If the pan becomes nearly dry before the chicken is done, add a small splash of broth or water. Conversely, if there is much more liquid than needed, uncover the pan briefly after removing the cooked chicken and let the liquid reduce gently.
Once the chicken reaches its safe internal temperature, remove the pan from the heat. Add the lemon juice and stir it into the cooking liquid.
Sensory checkpoint: The broth should smell savory and herbal, with a fresh citrus note. The chicken should feel tender when pierced, but tenderness alone cannot confirm food safety.
Step 4: Finishing, Resting, and Garnishing
Transfer the cooked chicken to a clean plate and let it rest for approximately 5 minutes. This brief pause makes handling easier and gives the meat time to settle before shredding.
Using two forks, hold each piece steady with one fork and pull the other along the natural grain of the meat. Continue until you achieve the texture you prefer.
For tacos and salads, medium length strands are usually practical. For sandwiches and wraps, finer shreds distribute more evenly and make the filling easier to bite through.
If you are preparing a large quantity, place the warm chicken in a heat safe bowl and use a hand mixer on low speed for short bursts. Stop frequently to avoid turning the chicken into a fine, mushy texture.
Return the shredded chicken to the skillet and toss it with a few spoonfuls of the warm cooking liquid. Add only enough to coat the strands lightly. This step is particularly important if you intend to refrigerate and reheat the chicken later.
Stir in the chopped parsley and taste a small portion. Add more lemon juice for brightness, freshly ground black pepper for warmth, or a pinch of salt if needed.
Serve immediately, or divide the chicken into shallow containers for meal preparation.
Final texture check: Properly cooked shredded chicken should separate into tender strands, remain moist when pressed with a fork, and carry the seasoning throughout rather than only on the surface.
The Science of Flavor & Chef’s Insider Techniques

A few simple culinary principles explain why this method produces better results than boiling chicken in plain water.
The Maillard Reaction Builds Savory Flavor
During searing, the chicken’s surface develops browned areas through the Maillard reaction, a collection of chemical reactions between amino compounds and reducing sugars. These reactions create many of the complex aromas associated with browned foods.
The chicken does not need a dark crust. A light golden surface is enough to contribute additional flavor to the broth and finished dish.
Drying excess surface moisture helps browning because energy is not spent evaporating as much water from the surface. However, searing is primarily a flavor building step; it does not seal juices inside the meat.
Gentle Simmering Supports a Tender Texture
Chicken proteins change structure as they heat. With prolonged cooking, muscle fibers contract and moisture is expelled, which can leave lean breast meat dry.
A gentle simmer provides more manageable heat than a vigorous boil. Nevertheless, the final temperature and cooking duration both matter, so use an instant read thermometer and remove each piece once it reaches 165°F (74°C).
Resting Makes Shredding Easier
A short rest gives the chicken time to cool slightly and makes the fibers easier to handle. It also reduces the amount of hot liquid released immediately when the meat is pulled apart.
The resting period does not replace temperature verification, and the chicken should not be left at room temperature for an extended period.
Acidity Balances Richness
Olive oil, browned chicken, and savory broth contribute richness. Lemon juice provides acidity, which helps the flavors feel brighter and less heavy.
Add lemon juice near the end rather than relying on a large quantity throughout the cooking process. This preserves its fresh character and gives you greater control over the final flavor.
Control the Liquid, Not Just the Heat
Broth helps distribute seasoning and keeps the cooking environment moist. However, too much liquid can dilute the flavor, while too little can cause the pan to dry out.
Start with the measured amount, keep the pan covered during simmering, and adjust only when necessary. Finally, toss the shredded chicken with a small amount of concentrated cooking liquid to help every strand taste seasoned and moist.
Common Cooking Mistakes & Troubleshooting Guide
Even a straightforward chicken recipe can produce disappointing results when a few details are overlooked. Fortunately, most problems are easy to prevent or correct.
Mistake 1: Overcooking the Chicken
Why it happens: Chicken breast is lean, and prolonged heating causes its muscle fibers to lose moisture.
How to fix it: Begin checking the temperature as the chicken approaches doneness. Remove each breast when its thickest part reaches 165°F (74°C).
If the cooked chicken is already dry, shred it finely and mix it with warm broth a little at a time. This cannot reverse moisture loss inside the fibers, but it can make the chicken easier to eat.
Mistake 2: Boiling the Broth Too Aggressively
Why it happens: High heat evaporates liquid quickly and makes it harder to control the cooking process.
How to fix it: Reduce the burner until the broth produces small, gentle bubbles. Keep the lid on and check the liquid periodically.
If the pan becomes dry, add a splash of broth or water rather than allowing the bottom to scorch.
Mistake 3: Adding Garlic Too Early
Why it happens: Minced garlic cooks much faster than thick chicken breasts and can become bitter when exposed to prolonged high heat.
How to fix it: Sear the chicken first, then sauté the garlic briefly before adding broth. If the garlic has already burned and smells acrid, remove the burnt material and clean the pan before continuing with fresh garlic and a little oil.
Mistake 4: Shredding Chicken That Has Become Too Cold
Why it happens: As chicken cools, handling becomes less convenient and the fibers may be harder to pull apart.
How to fix it: Allow the chicken to rest briefly, then shred it while still warm. If refrigerated chicken needs shredding, reheat it safely before handling or use a clean knife to cut it into smaller pieces.
Bonus tip: If your finished chicken tastes bland, do not immediately add large amounts of salt. First try a squeeze of lemon, freshly ground black pepper, chopped herbs, or a spoonful of the seasoned cooking liquid.
9. Food Safety, Storage, Meal Prep & Reheating
Proper food handling is essential whenever you prepare chicken ahead of time.
Safe Internal Temperature
Poultry should reach an internal temperature of 165°F (74°C). Check the thickest portion of each breast using a food thermometer. Color and texture alone cannot reliably establish that chicken is safe to eat.
Keep raw chicken separate from cooked chicken, salad ingredients, and other ready to eat foods. Use separate utensils and cutting boards, or thoroughly wash and sanitize equipment between tasks.
Do not rinse raw chicken in the sink. Wash your hands with soap after handling it, and clean surfaces that may have been contaminated.
Refrigerator Storage
Refrigerate cooked chicken within 2 hours of cooking, or within 1 hour when the surrounding temperature exceeds 90°F (32°C).
Store the chicken in shallow, airtight containers at 40°F (4°C) or below. Properly refrigerated cooked chicken generally keeps for 3–4 days.
For meal preparation, divide the chicken into individual portions before refrigeration. Keeping a little cooking liquid with each portion helps reduce dryness when reheating.
Freezer Storage
Freeze portions in airtight freezer safe containers or tightly sealed freezer bags. Remove excess air, label each package with the preparation date, and freeze promptly.
Cooked chicken remains safe indefinitely when continuously frozen at 0°F ( 18°C), although its texture and flavor are generally best when used within approximately 2–6 months.
Thaw frozen chicken in the refrigerator, in cold water using a leakproof bag with water changes every 30 minutes, or in a microwave followed by immediate reheating. Never thaw it on the kitchen counter.
Reheating Without Drying It Out
Reheat leftovers to 165°F (74°C). For stovetop reheating, place the chicken in a covered skillet with one or two tablespoons of broth or water per serving. Warm gently, stirring occasionally, until the entire portion reaches the safe temperature.
For microwave reheating, cover the container, add a little moisture, and stir midway through heating to distribute heat evenly.
Avoid repeatedly cooling and reheating the same batch. Instead, remove only the portion you plan to eat.
Nutrition & Dietary Considerations
This healthy shredded chicken recipe provides a concentrated source of protein, with moderate fat and relatively few carbohydrates. Its nutritional profile makes it suitable for many balanced eating patterns.
The following values are estimates for one of four servings, assuming the listed ingredients are used and the cooking liquid is distributed among the portions.
| Nutrient | Estimated amount per serving |
| Calories | 220–250 kcal |
| Protein | 38–43 g |
| Total carbohydrates | 2–4 g |
| Total fat | 6–8 g |
| Fiber | 0–1 g |
| Sodium | 300–500 mg |
Actual values can vary depending on the size and composition of the chicken, the broth brand, the amount of salt used, and how much cooking liquid is consumed.
For higher protein meals: Pair the chicken with Greek yogurt based sauce, beans, or a suitable whole grain side. Additional protein may not be necessary if the rest of your meal already meets your needs.
For lower sodium meals: Choose unsalted broth and reduce the added salt. Garlic, lemon juice, paprika, and herbs can provide plenty of flavor without relying heavily on sodium.
For lower carbohydrate meals: Serve the chicken with leafy greens, roasted cauliflower, zucchini, or sautéed cabbage. The chicken itself contains very little carbohydrate.
For balanced everyday meals: Combine the chicken with vegetables, a fiber rich carbohydrate such as brown rice or quinoa, and a source of unsaturated fat if needed.
Although this recipe can fit into weight management meal plans, no single food guarantees weight loss or a particular health outcome. Overall food choices, portion sizes, activity, and individual nutritional needs all matter.
Pairings & Serving Suggestions
One reason healthy shredded chicken recipes are so useful is that the same batch can become several different meals. Rather than repeating the same plate every day, change the sides, seasonings, and serving style.
1. Chicken and Brown Rice Bowls
Pair shredded chicken with brown rice, roasted broccoli, bell peppers, and a squeeze of lemon. The rice adds carbohydrates, while the vegetables contribute fiber and color. A spoonful of plain yogurt mixed with herbs makes a light topping.
2. Fresh Lettuce Wraps
Spoon the chicken into crisp lettuce leaves and add cucumber, diced tomatoes, avocado, and lime juice. These wraps are convenient for lunch and easy to customize for different preferences.
3. Whole Wheat Chicken Sandwiches
Combine shredded chicken with a little plain Greek yogurt, mustard, black pepper, and chopped celery. Serve on whole wheat bread with lettuce and tomato for a satisfying lunch.
4. Quick Chicken Tacos
Warm the chicken with cumin, chili powder, and a splash of broth. Serve in corn tortillas with black beans, cabbage, fresh salsa, and cilantro. Check tortilla labels if gluten avoidance is important.
More Serving Ideas
- Fresh salads: Add warm shredded chicken to spinach, mixed greens, cucumber, tomatoes, and a lemon vinaigrette.
- Comforting soups: Stir the chicken into vegetable soup or chicken and rice soup near the end of cooking.
- Pasta dishes: Toss with whole wheat pasta, sautéed spinach, cherry tomatoes, and a little olive oil.
- Simple breads: Serve alongside whole grain flatbread or crusty bread to soak up the seasoned cooking liquid.
- Beverages: Water with lemon, unsweetened iced tea, or sparkling water with cucumber makes a refreshing accompaniment.
For family dinners, place the chicken and several toppings on the table separately. Everyone can build a bowl, wrap, or plate according to their preferences, making one batch suitable for different appetites and dietary needs.
Final Verdict & Reader Invitation
Healthy shredded chicken recipes make everyday cooking easier by combining simple ingredients, practical techniques, and flexible serving options. This lemon garlic version delivers tender strands of chicken with a savory, fresh flavor that works for family dinners, quick lunches, and weekly meal preparation.
The most important habits are straightforward: season thoughtfully, simmer gently, verify the internal temperature, and mix the shredded chicken with enough cooking liquid to keep it moist.
Try this recipe with your favorite vegetables, grains, or homemade sauces, and discover which combinations your household enjoys most.
If you prepare it, leave a star rating and share your experience in the comments at DaliyDelish.com. Tell us which serving idea you tried, what substitutions worked for you, or what you would like to learn next. Your feedback can help other home cooks prepare more delicious meals with confidence.
Poaching, gentle simmering, steaming, and baking can all be healthy methods. For this recipe, gentle simmering with low sodium broth, herbs, garlic, and lemon creates a flavorful result without requiring much oil. Cook the chicken to 165°F (74°C), and serve it with vegetables and other foods that fit your nutritional needs.
Avoid overcooking the chicken, allow it to rest briefly before shredding, and mix the finished strands with a small amount of warm cooking liquid. For refrigerated leftovers, add broth or water before reheating and cover the pan or microwave safe container to help retain moisture.
Yes. Cook the chicken, verify its safe internal temperature, shred it, and refrigerate it promptly in shallow, airtight containers. Use refrigerated leftovers within 3–4 days. You can also freeze portions for longer storage and thaw them safely before reheating to 165°F (74°C).
Use it in salads, tacos, lettuce wraps, sandwiches, grain bowls, soups, casseroles, and whole wheat pasta dishes. Because this recipe has a balanced garlic and lemon flavor, it works with many different seasonings. Add cumin and chili for Mexican inspired meals, oregano for Mediterranean dishes, or ginger and soy sauce for an Asian inspired bowl.

Tosique Haider -Passionate writer sharing informative, engaging, and easy-to-read articles across different topics. Focused on delivering valuable content that helps readers learn, explore, and stay inspired every day.