

Introduction
Finding the perfect fruit for dessert can transform simple everyday ingredients into something genuinely special. Fresh fruits bring natural sweetness, beautiful colors, refreshing flavors, and different textures to homemade desserts. Whether you enjoy juicy berries, tender apples, sweet pears, or tropical fruits, there are countless ways to create delicious treats without relying entirely on complicated baking techniques.
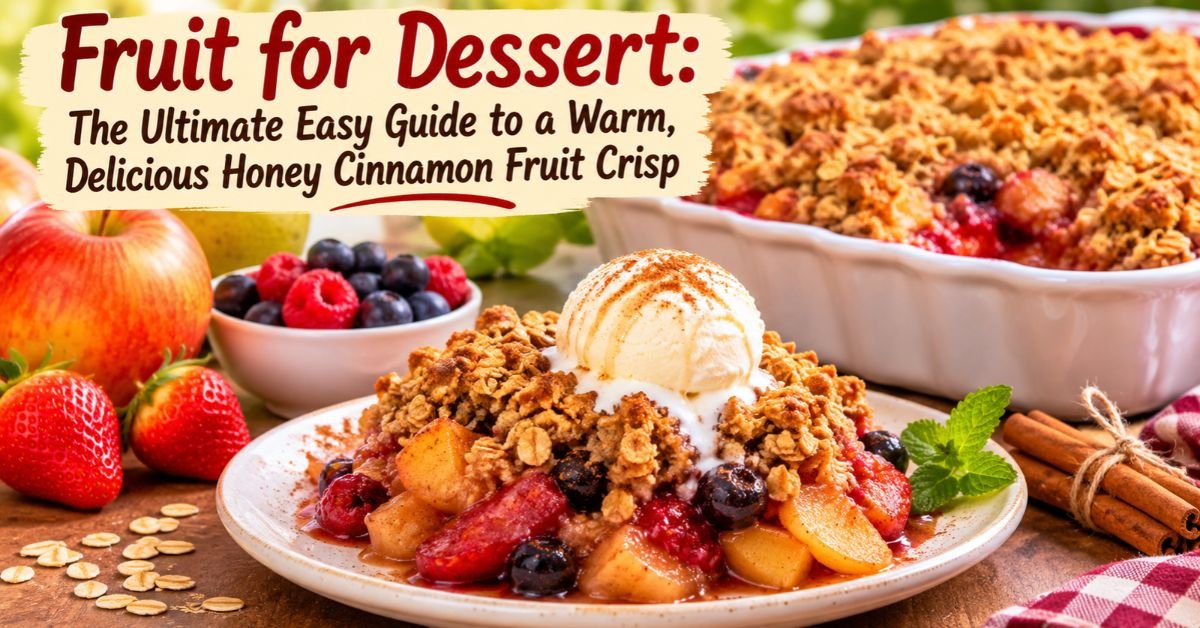
One particularly satisfying way to enjoy seasonal fruit is through a warm Honey Cinnamon Fruit Crisp. This homemade dessert combines tender apples, juicy pears, and colorful berries with a lightly sweetened honey-cinnamon coating. A golden oat topping adds a wonderful contrast, creating a combination of soft, bubbling fruit and crisp, buttery crumbs.
The aroma of this dessert is one of its best features. As the fruit warms in the oven, cinnamon releases its comforting fragrance while the honey blends with the natural juices. Meanwhile, the oat topping gradually turns golden brown, developing a delicate crunch that makes every spoonful enjoyable.
A Sweet Beginning: Discovering the Joy of Fresh Fruit Desserts
At DaliyDelish, our goal is to help home cooks discover practical, flavorful ways to prepare food using accessible ingredients. This fruit dessert is designed for readers who want an easy homemade sweet treat that works for family dinners, weekend gatherings, holiday tables, or ordinary evenings.
The recipe also offers plenty of flexibility. You can replace pears with peaches, use frozen berries when fresh ones are unavailable, or adjust the sweetness depending on the natural ripeness of your fruit.
Most importantly, this dessert celebrates the natural character of fruit. Instead of covering its flavor with excessive sugar, the recipe uses honey, cinnamon, citrus, and a simple oat topping to create a balanced and satisfying finish.
If you are searching for fruit for dessert that is easy to prepare, attractive to serve, and adaptable throughout the year, this warm fruit crisp is an excellent place to start.
Recipe Quick-Facts Summary Card
| Recipe Detail | Information |
| Recipe Name | Honey Cinnamon Fruit Crisp |
| Prep Time | 15 minutes |
| Cook Time | 35–40 minutes |
| Total Time | 50–55 minutes |
| Skill Level | Easy |
| Servings | 6 |
| Estimated Calories | 285 per serving |
| Estimated Cost | 1.50–2.25 per serving |
| Primary Diet Type | Vegetarian |
| Additional Options | Dairy-free and gluten-free adaptations |
| Cooking Method | Oven baking |
| Main Ingredients | Apples, pears, berries, oats, honey |
| Best Serving Temperature | Warm |
Recipe Overview: This homemade fruit crisp features naturally sweet fruit underneath a golden oat topping. It is ideal for family desserts, seasonal celebrations, and casual entertaining.
Nutrition and cost figures are estimates. Actual values depend on ingredient brands, fruit varieties, portion sizes, and local prices.
Why This Recipe Works (EEAT Value Points)
A successful fruit dessert should be more than simply sweet. It should offer balanced flavors, appealing textures, convenient preparation, and ingredients that work together naturally.
Here are five reasons this Honey Cinnamon Fruit Crisp deserves a place in your dessert collection.
1. Natural Fruit Sweetness Creates Better Flavor Balance
Apples and pears provide a mild sweetness, while berries introduce a refreshing tart flavor. Honey brings the ingredients together without overpowering their individual characteristics. A little lemon juice adds brightness and prevents the filling from tasting overly sweet.
This combination creates a more interesting flavor profile than using only one type of fruit.
2. Two Different Textures Make Every Bite Enjoyable
The fruit becomes soft and juicy during baking, while the oat topping develops a golden, crumbly texture. This contrast is particularly important because desserts become more enjoyable when they combine different mouthfeels.
For the best result, the topping should remain slightly crisp instead of becoming completely absorbed into the fruit juices.
3. Simple Techniques Make the Recipe Beginner-Friendly
You do not need advanced pastry skills, complicated equipment, or professional baking experience. The preparation involves cutting fruit, mixing a topping, arranging everything in a baking dish, and allowing the oven to do most of the work.
Even beginner cooks can prepare this dessert successfully by following the ingredient measurements and baking instructions.
4. Flexible Ingredients Help Control the Budget
The recipe works with seasonal fruit, which can make preparation more economical. Apples and pears are dependable choices, while berries can be adjusted according to availability.
Frozen berries are another convenient option. They provide fruit flavor throughout the year and reduce the pressure of buying expensive fresh produce.
5. Convenient Preparation Saves Time
Most of the preparation can be completed in approximately 15 minutes. Additionally, the fruit mixture and dry topping can be prepared separately ahead of time.
This makes the dessert particularly useful when preparing several dishes for a family gathering or dinner party.
Kitchen Tools & Equipment Guide

You do not need an extensive collection of baking equipment to prepare a delicious fruit crisp. A few reliable kitchen tools will make the process easier and help produce consistent results.
Essential Equipment:
- Baking Dish: A 9-by-9-inch (23-by-23-cm) baking dish provides enough room for the fruit filling and topping.
- Sharp Chef’s Knife: Helps cut apples and pears into evenly sized pieces.
- Cutting Board: Provides a stable and hygienic surface for preparing fruit.
- Large Mixing Bowl: Useful for combining fruit, honey, cinnamon, and lemon juice.
- Medium Mixing Bowl: Keeps the dry topping ingredients organized.
- Measuring Cups and Spoons: Ensure accurate ingredient proportions.
- Pastry Cutter or Fork: Helps combine butter with oats and flour.
- Spatula: Makes transferring and distributing the mixture easier.
- Oven Thermometer: Helps confirm that your oven maintains the correct temperature.
- Instant-Read Food Thermometer: Optional for checking the temperature of the baked dessert, although there is no meat-related internal temperature requirement for this recipe.
Chef’s Equipment Tip: Avoid using an extremely shallow baking dish. Fruit releases liquid during baking, and sufficient depth helps prevent bubbling juices from overflowing into your oven.
Ingredient Selection, Quality & Substitutions
Choosing good-quality fruit is the foundation of this recipe. Since fruit provides most of the dessert’s flavor, freshness, ripeness, and texture directly affect the final result.
Main Fruit Filling Ingredients
1. Apples – 2 medium (approximately 300 g)
Choose firm varieties such as Granny Smith, Honeycrisp, or Braeburn.
Apples provide structure and a slightly firm texture after baking. Tart apples are particularly useful because they balance the sweetness of honey and berries.
Peel the apples if you prefer a softer filling, or leave the skin on for additional texture.
2. Pears – 2 medium (approximately 300 g)
Select ripe but firm pears.
Pears provide a delicate floral sweetness and become tender during baking. Avoid extremely soft or overripe pears because they may lose their structure too quickly.
3. Mixed Berries – 1 cup (150 g)
Use a combination of strawberries, blueberries, raspberries, or blackberries.
Berries provide bright color and a slightly tangy flavor. They also release natural juices that create a delicious fruit sauce during baking.
Fresh or frozen berries can both work.
4. Honey – 3 tablespoons (45 ml)
Honey adds sweetness and helps coat the fruit evenly.
Its floral flavor complements apples, pears, and cinnamon. Adjust the amount according to the ripeness of your fruit.
5. Lemon Juice – 1 tablespoon (15 ml)
Fresh lemon juice provides acidity and helps balance the natural sweetness.
It also slows enzymatic browning on freshly cut apples and pears.
6. Ground Cinnamon – 1 teaspoon (2.6 g)
Cinnamon introduces warmth and fragrance.
It works particularly well with apples and pears, making the dessert smell inviting as it bakes.
7. Cornstarch – 1 tablespoon (8 g)
Cornstarch helps thicken the fruit juices released during baking.
Without a thickening ingredient, the filling may become excessively watery, especially when using frozen berries.
Golden Oat Topping Ingredients
- Rolled oats – 1 cup (90 g)
- All-purpose flour – ½ cup (60 g)
- Brown sugar – ¼ cup (50 g)
- Unsalted butter, cold and cubed – ¼ cup (57 g)
- Ground cinnamon – ½ teaspoon (1.3 g)
- Salt – ⅛ teaspoon (approximately 0.75 g)
The oats provide a pleasant crunch, while flour helps bind the topping. Brown sugar contributes a mild caramel-like flavor, and cold butter creates small crumbly pieces that become golden during baking.
Ingredient Quality Tips
Whenever possible, select fruit that is fragrant, naturally colorful, and free from mold, bruising, or damaged areas.
Apples should feel firm, pears should have slight ripeness without becoming mushy, and berries should be dry and intact.
For the topping, use old-fashioned rolled oats rather than instant oatmeal. Rolled oats generally maintain a more satisfying texture during baking.
Practical Ingredient Substitutions
Dairy-Free Version: Replace butter with an equal amount of chilled dairy-free baking butter or solid plant-based baking fat. Check that the product is suitable for baking.
Gluten-Free Version: Replace all-purpose flour with a certified gluten-free baking flour blend and choose certified gluten-free oats.
Lower-Sodium Version: Omit the small amount of salt. The recipe will still taste delicious because the fruit, cinnamon, and honey provide plenty of flavor.
Lower-Carbohydrate Adaptation: Replace the apples and pears with a suitable mixture of lower-carbohydrate fruits, such as strawberries and raspberries. Use an appropriate low-carbohydrate sweetener and topping ingredients. Remember that this changes the nutritional profile and is not automatically suitable for every ketogenic diet.
Vegan Adaptation: Replace honey with maple syrup and butter with plant-based baking butter.
Seasonal Fruit Substitutions: Peaches, nectarines, plums, and cherries can replace some or all of the apples and pears. However, softer fruits may need slightly less baking time.
Culinary Masterclass: Step-by-Step Instructions
Preparing a successful fruit crisp involves controlling moisture, distributing sweetness evenly, and creating a topping that becomes golden without burning.
Follow these four stages for a delicious result.
Step 1: Prep Work & Fruit Preparation
Begin by preheating your oven to 350°F (175°C).
Lightly grease a 9-by-9-inch baking dish with a small amount of butter or neutral cooking oil.
Wash the apples, pears, and fresh berries thoroughly under clean running water. Clean a kitchen towel and pat them dry.
Remove the apple cores and cut the apples into approximately ½-inch (1.25-cm) pieces.
Prepare the pears in a similar size. Keeping the fruit pieces reasonably uniform helps them cook at approximately the same rate.
If using strawberries, remove their green tops and cut larger berries into smaller pieces. Blueberries can remain whole.
Prepare all the fruit and combine it in a large bowl
Combine honey, lemon juice, ground cinnamon, and cornstarch.
Gently toss everything using a spatula until the fruit is evenly coated.
Avoid stirring aggressively because raspberries and very ripe berries can break apart easily.
Sensory Check: The fruit should look lightly glossy, with cinnamon distributed throughout the mixture. You should notice a pleasant combination of citrus and warm spice.
Transfer the filling into the prepared baking dish and spread it evenly.
Step 2: Preparing the Golden Oat Topping
Mix the flour, rolled oats, brown sugar, cinnamon, and salt separately.
Stir until the dry ingredients are evenly distributed.
Add the cold butter cubes.
Using your fingertips, a pastry cutter, or a fork, work the butter into the mixture.
Continue until the topping resembles coarse breadcrumbs with some larger pea-sized pieces.
Do not melt the butter before adding it. Cold butter helps create a crumbly texture and prevents the topping from becoming excessively dense.
Spread the oat mixture evenly over the fruit filling.
Do not press the topping too firmly. A loose layer allows heat to circulate and helps the surface develop a crisp texture.
Chef’s Tip: Leave a few small gaps around the edges. This allows some fruit juices to bubble through while the topping browns.
Step 3: Baking & Developing the Fruit Sauce
The baking dish should be placed on the middle rack of the preheated oven.
Bake for approximately 35–40 minutes.
During the first 15 minutes, the fruit begins warming and releasing moisture.
As the baking continues, the honey, fruit juices, and lemon combine into a flavorful syrup.
The apples and pears gradually soften, while the berries release their colorful juices.
Meanwhile, the oat topping begins changing from pale beige to a beautiful golden-brown color.
At around 30 minutes, inspect the dessert.
If the topping is browning too quickly while the fruit remains firm, loosely cover the dish with aluminum foil and continue baking.
The dessert is ready when:
- The topping looks golden brown.
- The fruit filling bubbles gently around the edges.
- A knife or skewer slides into an apple piece with little resistance.
- The fruit sauce appears slightly thickened rather than completely watery.
The fruit should be tender but not completely disintegrated.
Remember that oven temperatures vary. Therefore, use these visual and texture indicators alongside the recommended baking time.
Step 4: Finishing, Resting, and Garnishing
Remove the baking dish carefully using oven mitts.
Place it on a heat-resistant surface and allow it to rest for approximately 15–20 minutes.
This resting period is important because the fruit juices continue thickening as the dessert cools slightly.
It also makes serving easier and reduces the risk of excessively hot fruit filling burning your mouth.
For an attractive presentation, add a few fresh berries over the top.
You can also sprinkle a little ground cinnamon or add thin slices of fresh strawberries.
Serve warm with:
- A scoop of vanilla ice cream.
- Plain or lightly sweetened Greek yogurt.
- A spoonful of whipped cream.
- A small drizzle of maple syrup.
- Fresh mint leaves for a refreshing finish.
Final Texture Goal: Every serving should contain soft, flavorful fruit, a lightly thickened sauce, and a crunchy golden oat topping.
The Science of Flavor & Chef’s Insider Techniques
Understanding the science behind fruit desserts helps you achieve more consistent results.
Although this recipe is relatively simple, several important culinary processes determine its final flavor and texture.
Understanding Fruit’s Natural Sugars
Fruit contains naturally occurring sugars, including glucose, fructose, and sucrose.
Different fruits have different sugar-to-acid ratios.
For example, Granny Smith apples generally taste more tart than ripe pears. Raspberries also provide a noticeable acidity that balances sweeter ingredients.
Combining different fruits creates a more complex flavor profile.
This is why a mixture of apples, pears, and berries works particularly well.
Why Acidity Matters
Lemon juice is not included simply for decoration.
Its acidity helps balance sweetness and makes the fruit flavors taste brighter.
Additionally, lemon juice slows the enzymatic browning process that occurs when cut apples and pears are exposed to oxygen.
However, use a moderate amount. Too much lemon juice can make the dessert excessively tart.
How Cornstarch Thickens Fruit Juices
As fruit heats, its cells soften and release moisture.
Without a thickener, this liquid can collect at the bottom of the baking dish.
Cornstarch helps solve this problem through gelatinization.
When heated in sufficient moisture, starch granules absorb water, swell, and contribute to a thicker sauce.
For the best result, distribute cornstarch evenly throughout the fruit mixture before baking.
Developing a Golden Oat Topping
The topping develops its color through several processes, including browning reactions involving sugars and proteins.
The Maillard reaction can contribute to browning in ingredients containing suitable proteins and reducing sugars. Sugar caramelization also contributes to the development of deeper flavors.
The butter helps coat the dry ingredients, while the flour and oats create a crumbly structure.
Cold butter is particularly useful because it helps maintain small pieces within the topping before baking.
Five Chef’s Insider Techniques
1. Choose Fruit at Different Ripeness Levels
Using slightly firm apples and pears helps prevent the filling from becoming overly soft.
2. Keep the Pieces Uniform
Consistent cutting improves heat distribution and reduces the possibility of some fruit becoming mushy while other pieces remain firm.
3. Avoid Excessive Sweetener
Taste the fruit before adding honey. Naturally ripe fruit may need less additional sweetness.
4. Protect the Topping
If the topping becomes golden before the fruit is tender, cover the dish loosely with foil.
5. Allow the Dessert to Rest
Resting gives the juices time to thicken, making the dessert easier to portion and serve.
Common Cooking Mistakes & Troubleshooting Guide
Even a straightforward fruit dessert can develop texture problems if moisture, temperature, or ingredient proportions are not properly managed.
Here are four common mistakes and practical solutions.
Mistake 1: The Fruit Filling Becomes Too Watery
Why It Happens:
Fruit naturally releases water during baking. Frozen berries, particularly when added with excess ice, can introduce additional moisture.
How to Fix It:
- Measure the cornstarch accurately.
- Avoid adding excess liquid sweeteners.
- Drain thawed fruit if it has released a large amount of liquid.
- Bake until the filling bubbles and thickens.
If the dessert is already baked but still watery, allow it to rest longer. The filling may thicken as it cools.
Mistake 2: The Oat Topping Becomes Soft
Why It Happens:
Excess moisture, melted butter, or tightly packed topping can prevent a crisp finish.
How to Fix It:
Use cold butter and avoid pressing the topping down.
If the fruit is already tender but the topping needs more color, place the dish under a carefully monitored broiler for a very short period.
Watch continuously because oats and brown sugar can burn quickly.
Mistake 3: The Fruit Becomes Mushy
Why It Happens:
Overripe fruit, very small pieces, or excessive baking time can cause the filling to lose its structure.
How to Fix It:
Choose firm fruit and cut it into approximately equal pieces.
Check the dessert after 30 minutes rather than automatically extending the cooking time.
Remember that softer fruits such as raspberries and peaches may break down faster than apples.
Mistake 4: The Dessert Tastes Too Sweet or Too Tart
Why It Happens:
Different fruit varieties have different natural sweetness and acidity levels.
A combination containing mostly ripe pears and sweet berries may require less honey than one containing tart apples and raspberries.
How to Fix It:
Taste the fruit mixture before baking.
If it is too tart, add a small amount of honey. If it is excessively sweet, add a little lemon juice.
Make small adjustments rather than adding large amounts of sweetener or citrus.
Food Safety, Storage, Meal Prep & Reheating

Proper food handling is essential when preparing fruit desserts, particularly when fresh produce and dairy-based toppings are involved.
Washing and Preparing Fruit Safely
Wash your hands with soap and water before handling ingredients.
Rinse fresh fruit under clean running water before cutting or peeling it.
Do not use soap or household cleaning products on fruit.
Remove damaged or moldy fruit rather than trying to disguise it through baking.
Use clean cutting boards, knives, bowls, and utensils.
If you are also preparing raw meat for dinner, keep its preparation equipment separate from fruit and ready-to-eat ingredients.
Safe Baking and Serving
Bake the dessert at the recommended oven temperature of 350°F (175°C).
Unlike meat dishes, this recipe does not require an internal temperature of 165°F (74°C). Instead, check that the apples and pears are tender and the filling is bubbling.
The center should be hot throughout.
Allow the dessert to cool slightly before serving because bubbling fruit juices can cause burns.
Refrigerator Storage
Transfer leftover fruit crisp into a clean, airtight container once it has cooled sufficiently.
Refrigerate within two hours of cooking, or within one hour when the surrounding temperature exceeds 90°F (32°C).
For best quality, consume refrigerated leftovers within 3–4 days.
Freezer Storage
You can freeze baked fruit crisp for approximately 2–3 months for good quality.
Divide it into individual portions or use a freezer-safe container.
Allow frozen portions to thaw in the refrigerator before reheating.
The oat topping may become softer after freezing, but reheating in an oven can help restore some crispness.
Reheating Instructions
Oven Method:
Preheat the oven to 325°F (163°C).
Place the desired portion in an oven-safe dish and cover loosely with foil.
Heat until the center reaches 165°F (74°C) for safe reheating of leftovers. Remove the foil during the final few minutes if you want to refresh the topping.
Microwave Method:
Place an individual portion in a microwave-safe bowl.
Heat in short intervals, stirring or checking between intervals when practical.
The microwave is convenient, although the topping will generally become softer.
Make-Ahead Preparation
For easier entertaining, prepare the fruit filling and topping separately.
Store the fruit mixture covered in the refrigerator and keep the topping in a separate airtight container.
Assemble the dessert shortly before baking for the best topping texture.
Nutrition & Dietary Considerations
This Honey Cinnamon Fruit Crisp combines fruit, oats, butter, and honey into a satisfying homemade dessert.
Fruit contributes carbohydrates, natural sugars, and dietary fiber. Oats provide additional fiber and carbohydrates, while butter contributes fat.
The recipe can be included in a balanced eating pattern, with portion size and individual nutritional needs taken into consideration.
Estimated Nutrition Per Serving
| Nutrient | Approximate Amount |
| Calories | 285 kcal |
| Protein | 3.5 g |
| Total Carbohydrates | 49 g |
| Total Fat | 9 g |
| Dietary Fiber | 5 g |
| Total Sugars | 30 g |
| Sodium | 65 mg |
Based on six servings:These figures are estimates rather than laboratory-tested nutritional values. Actual amounts depend on the selected fruits, ingredient brands, and serving sizes.
Understanding the Nutritional Ingredients
Apples and Pears: Provide carbohydrates and dietary fiber, including soluble fiber.
Berries: Contribute fiber and naturally occurring plant compounds.
Oats: Supply carbohydrates, fiber, and small amounts of protein.
Honey: Provides added sugars and should be considered when monitoring overall sugar intake.
Butter: Adds richness and contributes saturated fat.
Dietary Adjustments
- Vegetarian: The original recipe is vegetarian.
- Vegan: Replace honey and butter with plant-based alternatives.
- You can use oats or flour that has been certified gluten-free.
- Dairy-Free: Replace butter with dairy-free baking butter.
- Lower Added Sugar: Reduce honey and brown sugar gradually, adjusting according to fruit sweetness.
Although fruit contains valuable nutrients, this dessert should still be enjoyed as a dessert rather than treated as a replacement for a complete balanced meal.
People managing blood glucose levels may wish to consider the carbohydrate and added-sugar content when choosing their portion size.
Pairings & Serving Suggestions
A beautiful fruit dessert becomes even more enjoyable when served with complementary flavors and textures.
The warm fruit filling and crunchy oat topping pair especially well with cool, creamy accompaniments.
1. Vanilla Ice Cream
A scoop of vanilla ice cream is one of the most classic choices.
Its cool, creamy texture contrasts beautifully with the warm apples, pears, and berries.
The vanilla flavor also complements the cinnamon without overpowering the fruit.
2. Greek Yogurt
Plain Greek yogurt offers a slightly tangy flavor that balances the sweetness of the fruit.
It is a practical choice for people who prefer a less sweet accompaniment.
3. Fresh Whipped Cream
Lightly whipped cream creates a soft, airy contrast against the crisp oat topping.
Avoid adding excessive sugar because the fruit filling already contains honey and natural sugars.
4. Toasted Nuts
Chopped almonds, walnuts, or pecans add another layer of crunch.
Sprinkle a small quantity over each serving immediately before presenting the dessert.
5. Fresh Mint and Berries
A few mint leaves and fresh berries make the dessert look attractive.
This simple garnish is particularly useful when serving the recipe at family gatherings or dinner parties.
Beverage Pairings
Consider serving the fruit crisp with:
- Freshly brewed black tea.
- Cinnamon herbal tea.
- Unsweetened iced tea.
- Warm milk.
- Fresh sparkling water with lemon.
Serving Ideas for Different Occasions
Family Dinner: Serve individual portions in small dessert bowls.
Holiday Gatherings: Prepare the crisp in a decorative ceramic baking dish and place it in the center of the dessert table.
Weekend Brunch: Offer smaller portions alongside plain yogurt and fresh fruit.
Dinner Parties: Serve warm portions with vanilla ice cream and toasted almonds.
The key is to keep the presentation simple and allow the natural colors of the fruit to stand out.
Final Verdict & Reader Invitation
Choosing the right fruit for dessert is a simple way to create flavorful homemade treats with beautiful colors, refreshing sweetness, and enjoyable textures.
This Honey Cinnamon Fruit Crisp brings together tender apples, juicy pears, colorful berries, and a golden oat topping to create a dessert suitable for family dinners, celebrations, and everyday enjoyment.
The best part is its flexibility. You can experiment with seasonal fruits, adjust the sweetness, and choose toppings that match your preferences.
Now it is your turn to bring this delicious dessert into your kitchen!
A Sweet Ending: Enjoy, Share & Create Your Own Fruit Dessert!
If you prepare this recipe, please leave a 5-star rating if you enjoyed it and share your experience in the comments at DaliyDelish.com. We would love to hear which fruits you used and how your dessert turned out.
Happy Baking from DaliyDelish!
Some of the best fruits for dessert include strawberries, blueberries, raspberries, apples, pears, peaches, mangoes, cherries, and bananas. The ideal choice depends on the dessert you are preparing. Apples and pears work particularly well in baked recipes, while berries, mangoes, and strawberries are excellent for fresh fruit bowls, parfaits, and chilled desserts.
Start with fresh or frozen fruit and use natural flavor enhancers such as cinnamon, lemon juice, and vanilla extract. Choose smaller amounts of added sweeteners and consider toppings such as plain yogurt, nuts, or oats. Remember that homemade desserts can still contain significant carbohydrates, fats, and sugars depending on their ingredients and portion sizes.
Yes. Frozen fruit works well in many homemade desserts, including fruit crisps, cobblers, sauces, and baked fruit dishes. For this recipe, frozen berries can be added directly, although they may release more moisture. Make sure the filling contains the recommended cornstarch and allow enough baking time for the fruit to become tender and the sauce to thicken.
A mixed-fruit crisp is an excellent option because it requires simple ingredients and minimal preparation. Combine chopped apples, pears, and berries with honey and cinnamon, then add an oat topping and bake until golden. You can prepare the components ahead of time and assemble the dessert shortly before baking. Serve warm with vanilla ice cream for an attractive homemade finish.

Tosique Haider -Passionate writer sharing informative, engaging, and easy-to-read articles across different topics. Focused on delivering valuable content that helps readers learn, explore, and stay inspired every day.